×
![]()
The Marine Sierra Hotel Aviation Readiness Program (M-SHARP), is an automated, federal-owned
database and web-based software program that provides real time forecasting, scheduling,
execution, and reporting of accurate data and information for US Marine Corps aviation training
and readiness tracking.
Training and Readiness(T&R) Builder tool inside M-SHARP software
provides the option to create, edit, and publish draft/version T&R program manuals for the
Marine Corps.
Humans impacted 🏆: 100,000+
Gather user requirements, research, product design from concept to production, user experience strategy, interactive prototypes, visuals, usability testing.
T&R Builder is a new tool that will be added to the existing M-SHARP software, it can create/edit/publish a draft/version T&R manual. This Training and Readiness (T&R) Manual establishes training standards, regulations, and policies regarding the training of Marines in the required fields.
"We follow the design principle - Keep It Simple, Stupid"
To design and develop a meaningful experience for the commanders to construct, attain and maintain the T&R manuals by strictly sticking to the user requirements.
Consistency is the key. To be consistent throughout the M-SHARP software's design and development of the features.
Given the complex nature of the product and the workflows, it was essential to design an easy-to-use application where users achieve their goals within a few clicks.
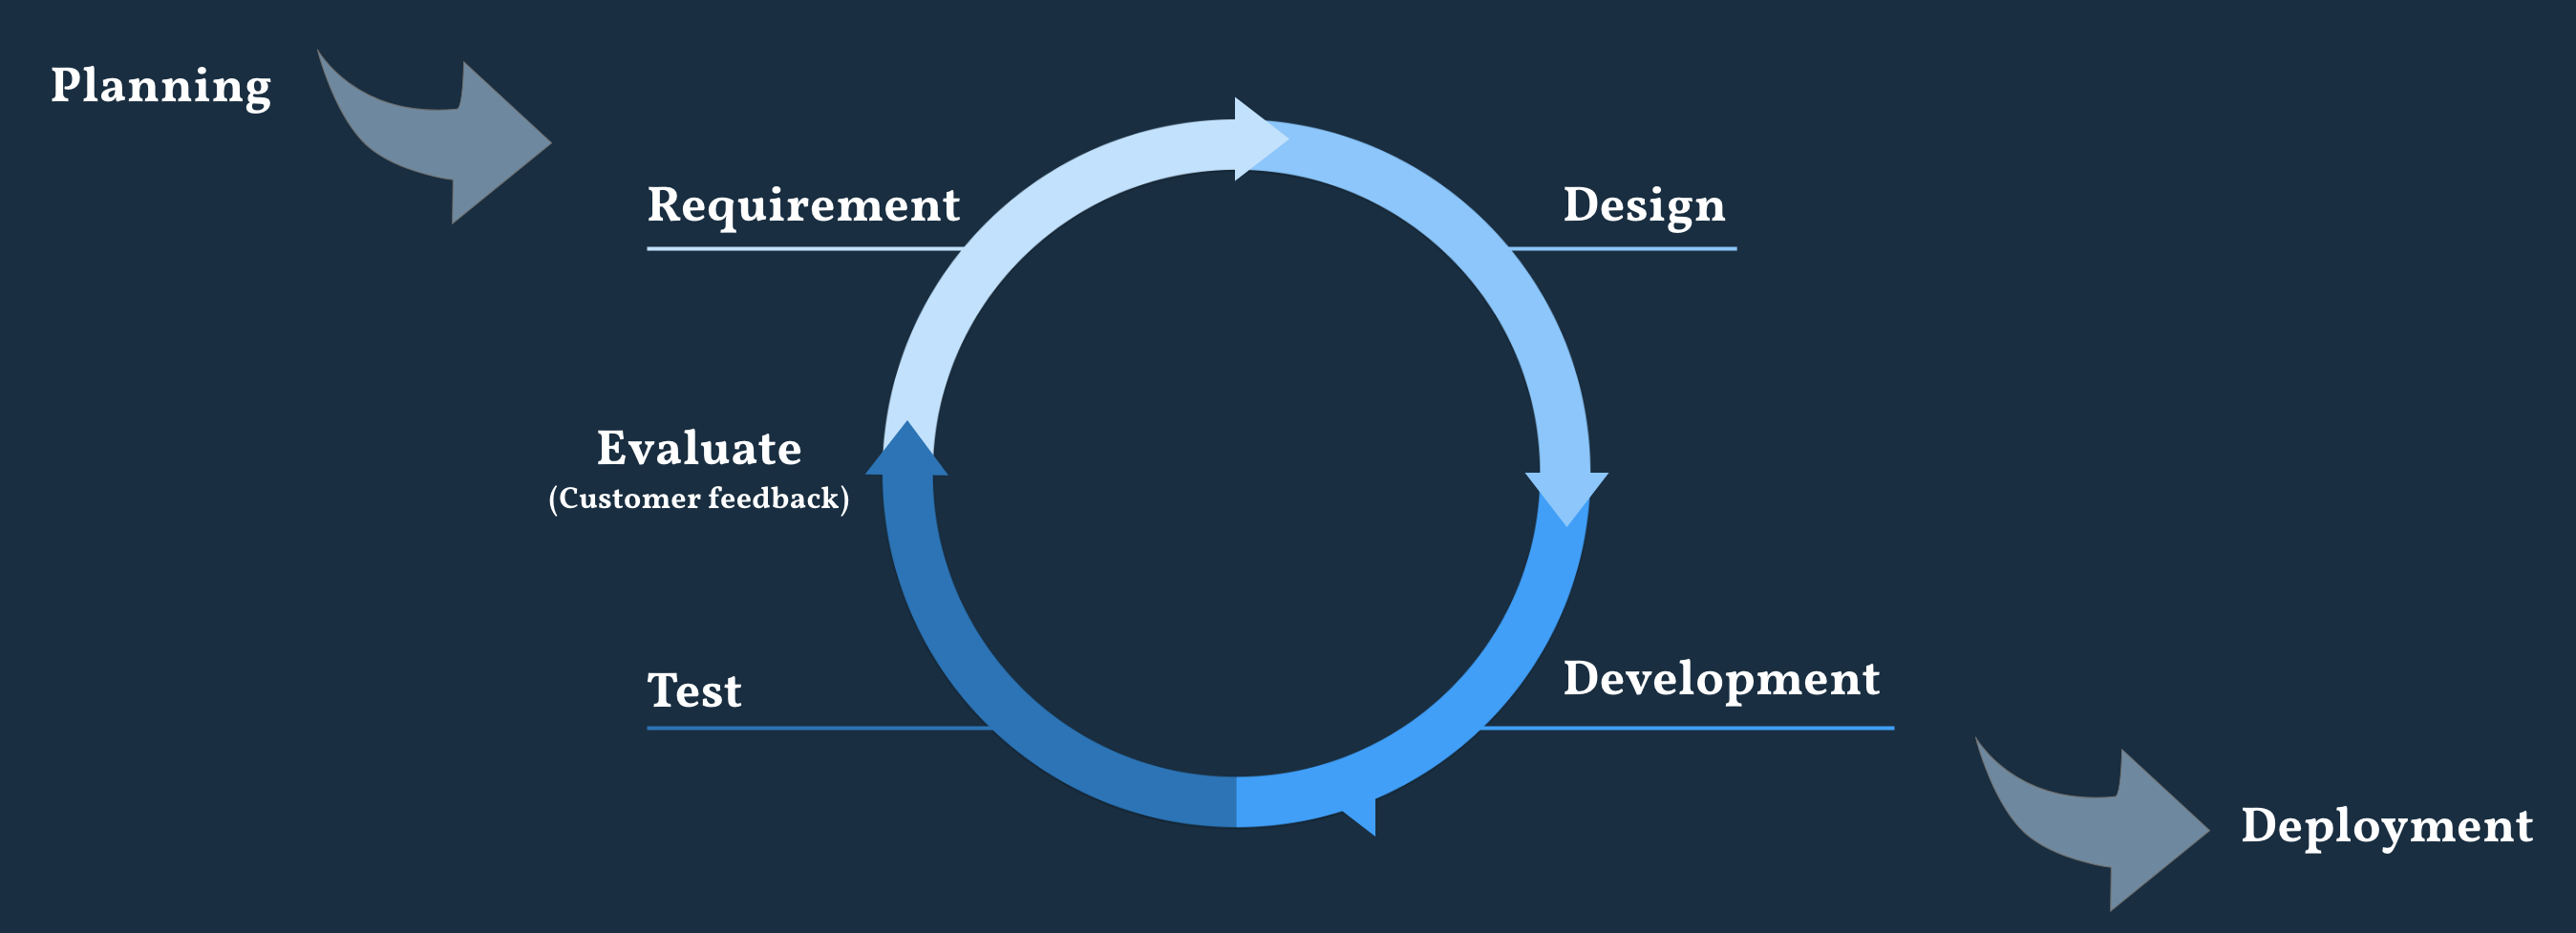
We followed an iterative process of planning, designing, developing and testing to build our product. We divided the complex product(T&R Builder tool) into smaller features to simplify our process and workflow.
“Being the sole designer, I got the opportunity to get involved in the whole product life cycle.”
We started our process by planning the broken small features of the complex product. The Product Owners take charge by briefing out the user requirements and business goal to the team members (developers, designer, scrum master, QA engineer, program manager).
Our business goal is “Customer Satisfaction”
After our initial planning, we analyze the requirements and prioritize them according to the MoSCoW method:
Once the requirements are prioritized, we dive deep into user context and empathize it. As both our product owners are marine veterans who have used and worked on the M-SHARP software for more than 10 years, they play a major role in advocating how the users think, feel and behave.
To understand more about the problem and user needs, I have attended a Training & Readiness (T&R) conference where I had the opportunity to practically observe how the Marine’s work on the manual, their workflow to baseline a manual and how standards are established. From these ethnographic observations, I have defined what can be improved.
Based on my research, I ended up with the below diagram that depicts a T & R Manual's process.

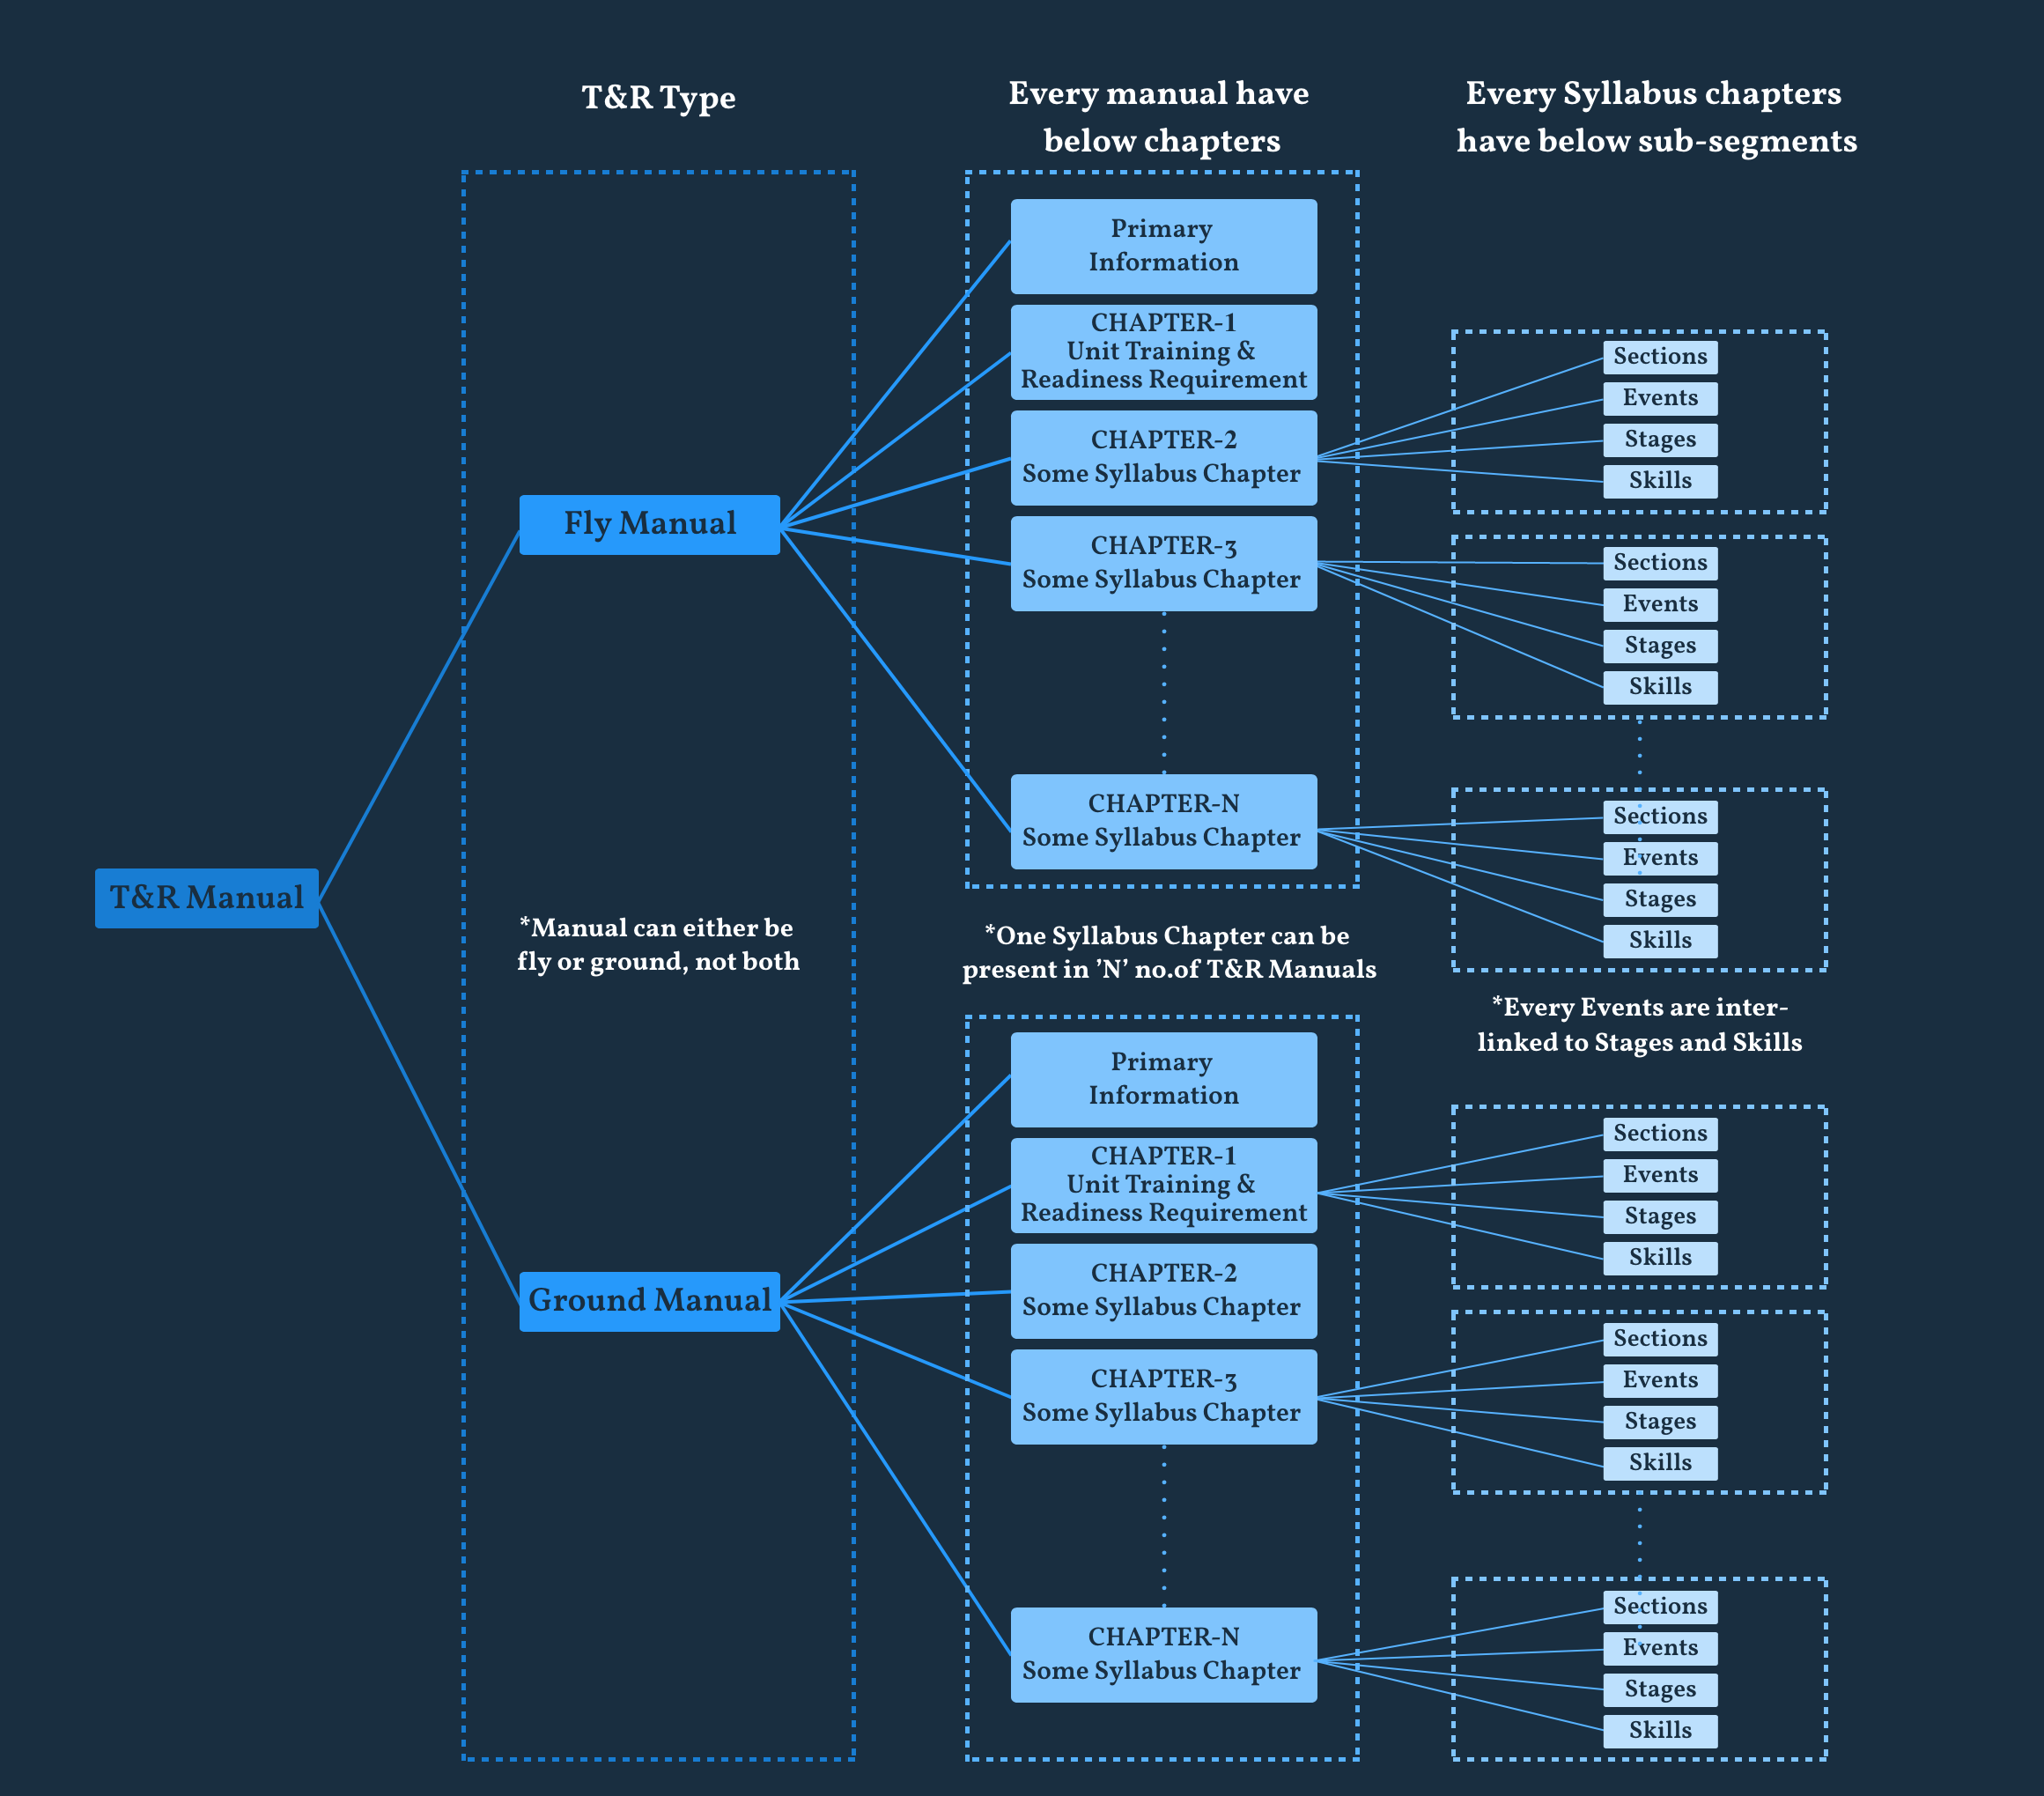
I designed the below T & R architecture that shows the types of manual's and how each type is structured within itself. This was helpful for the team members in understanding the layers in a manual.
Once we are done with all the “Why” questions in the analysis stage, now we are ready to find the “How” to solve the problem. Here in the Design stage, I follow a cyclic process of ideating, prototyping, testing and repeat | repeat | repeat. Iterative design helped us to improve usability and to understand the problem in the early stages.
"In an iterative design you can design it once but make it better as many times you need”
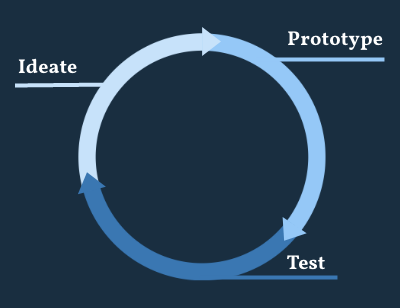
As we are ready with our user data in the Planning and Requirement Analysis Stage, I started to explore innovative solutions in this stage. I led the brainstorming sessions and prioritized ideas by breadth over depth as the main focus is getting a diverse range of ideas to prototype and test.
"Emphasis on quantity rather than quality during ideation.”
We are a small team of 4 (designer-me, product owners-2 and solutions architect-1; we call ourselves as Solution’s team 😄) so we generally refine and narrow down the ideas by discussing the pros and cons of it.
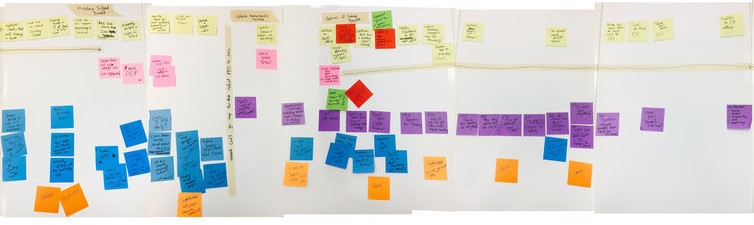
Now is the time to prototype the ideas which were narrowed down and to check their feasibility. Initially, I work on sketching all the possible ideas before I move on to designing the high-fidelity wireframes and prototypes. In this initial phase, I mainly care about the functionality, key feature to add in and the basic structure.
"A wireframe acts as a visual representation for designer’s ideas”
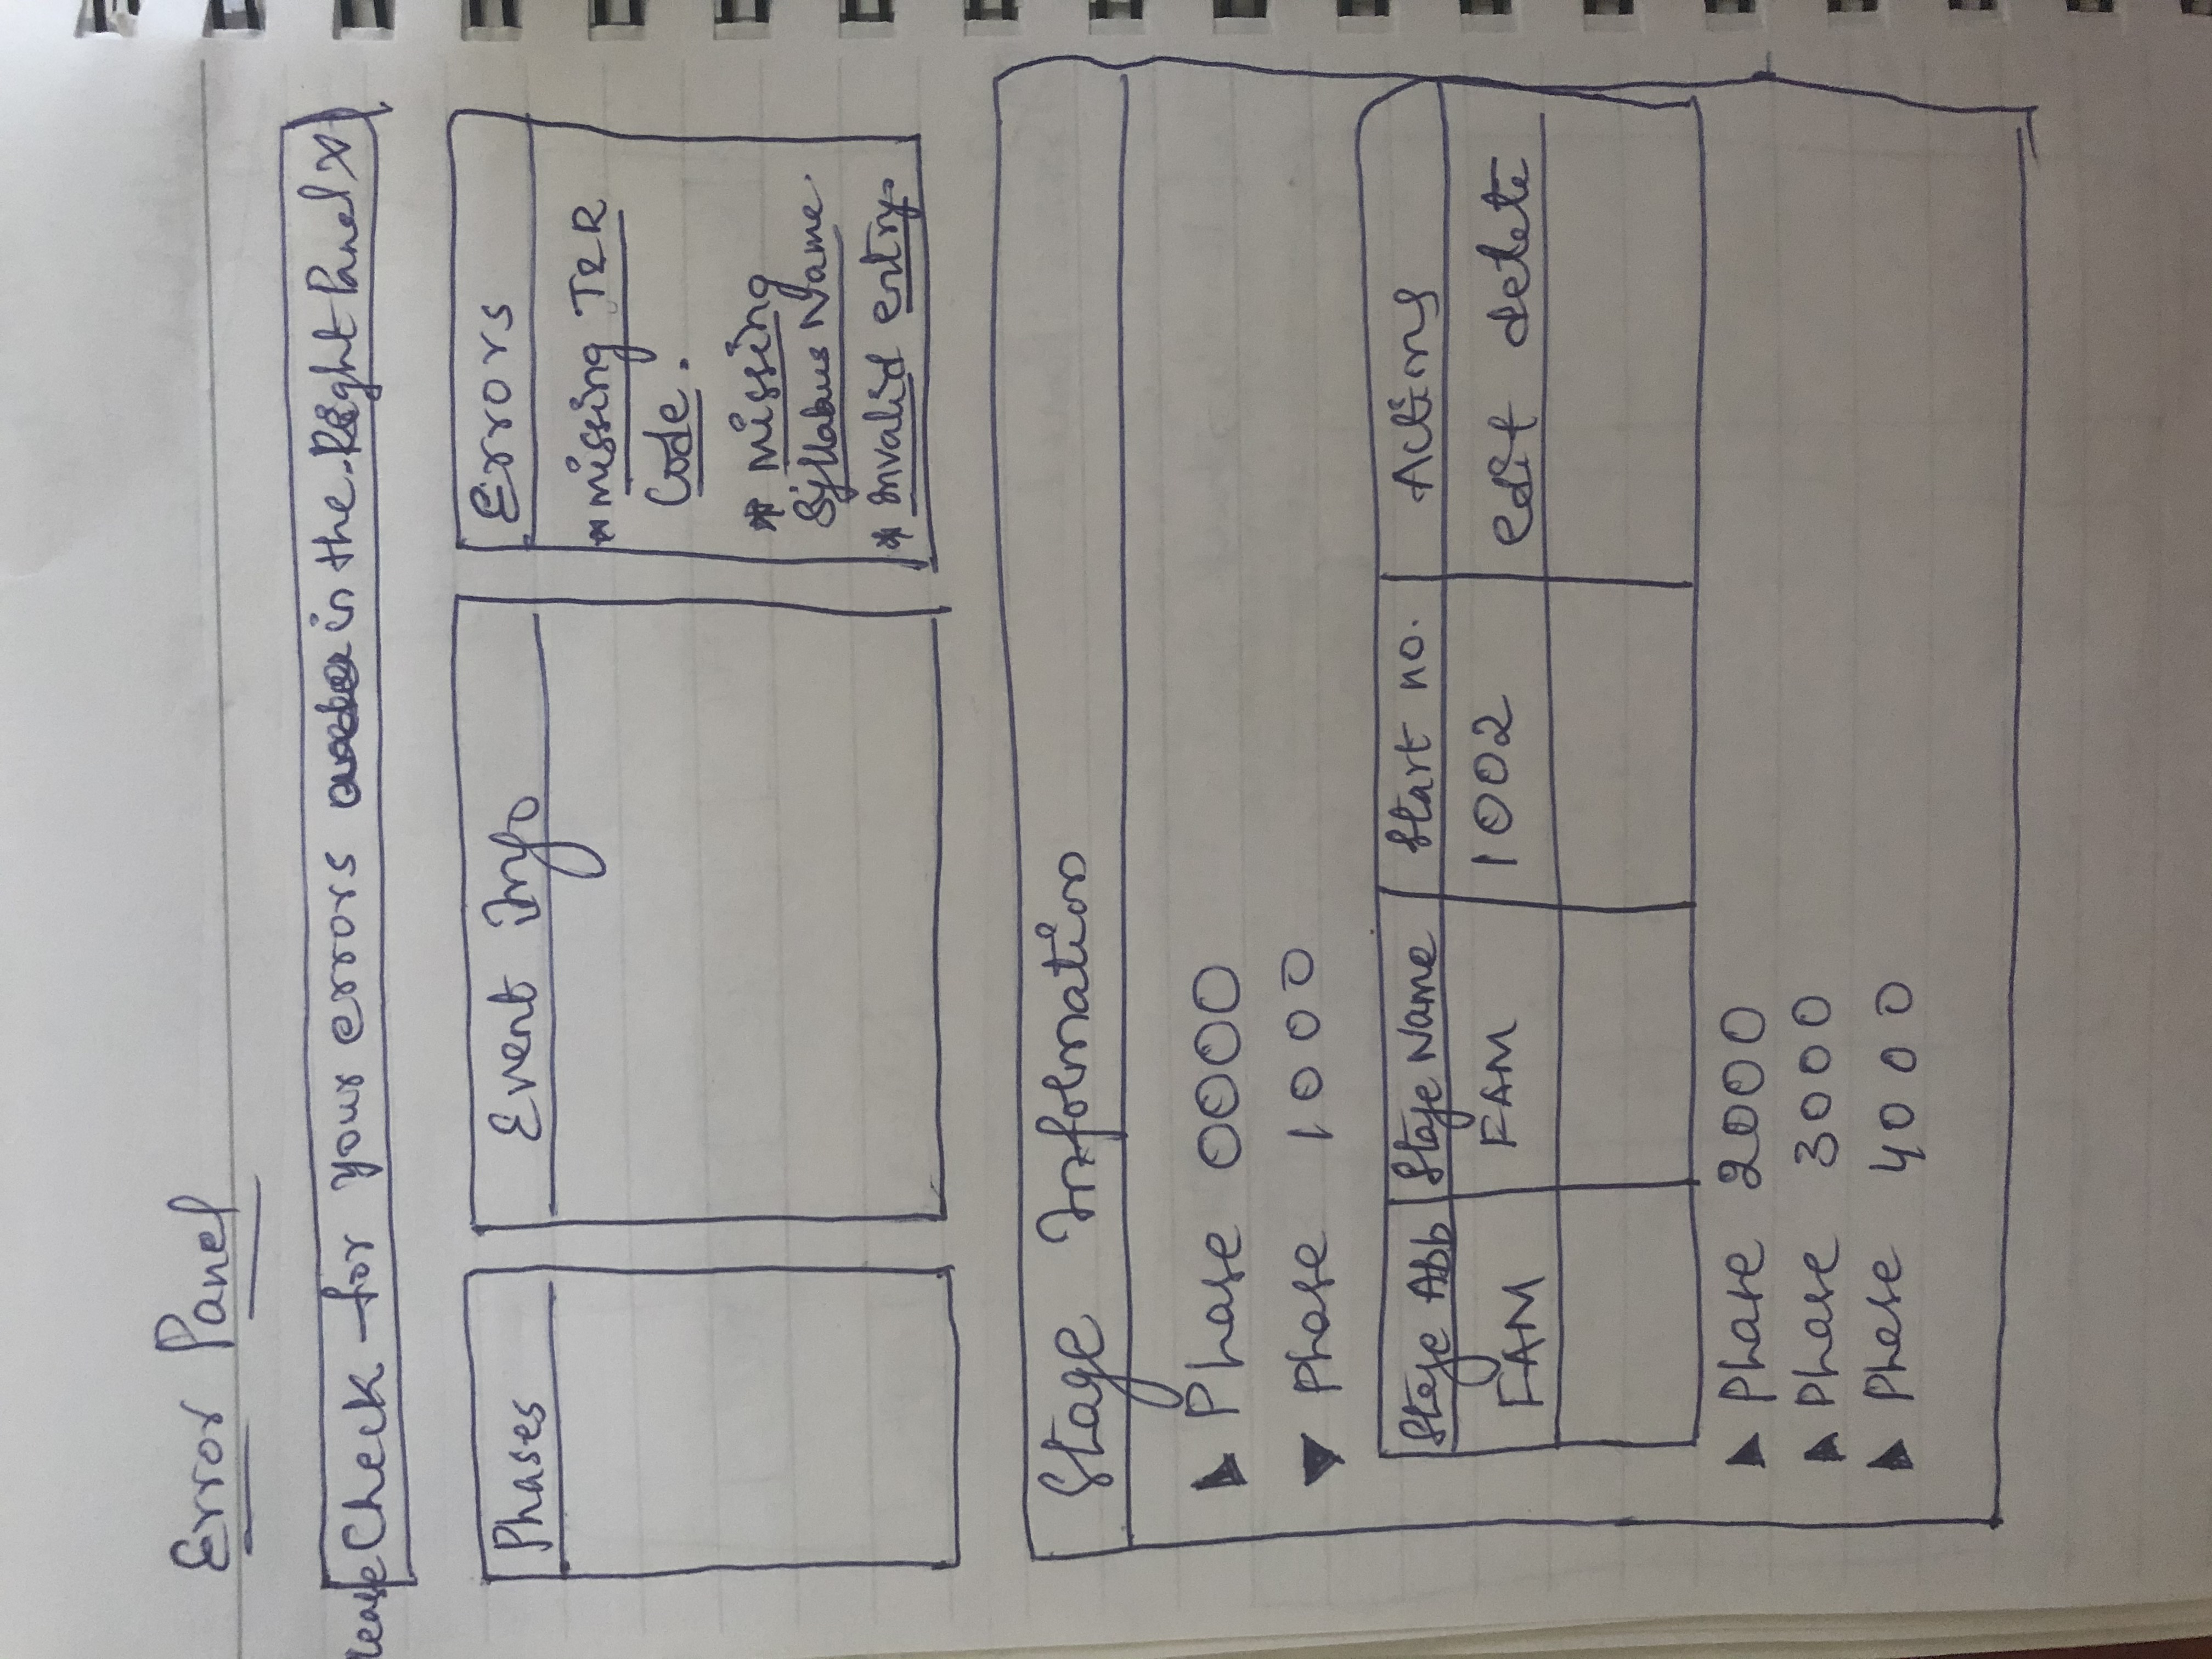
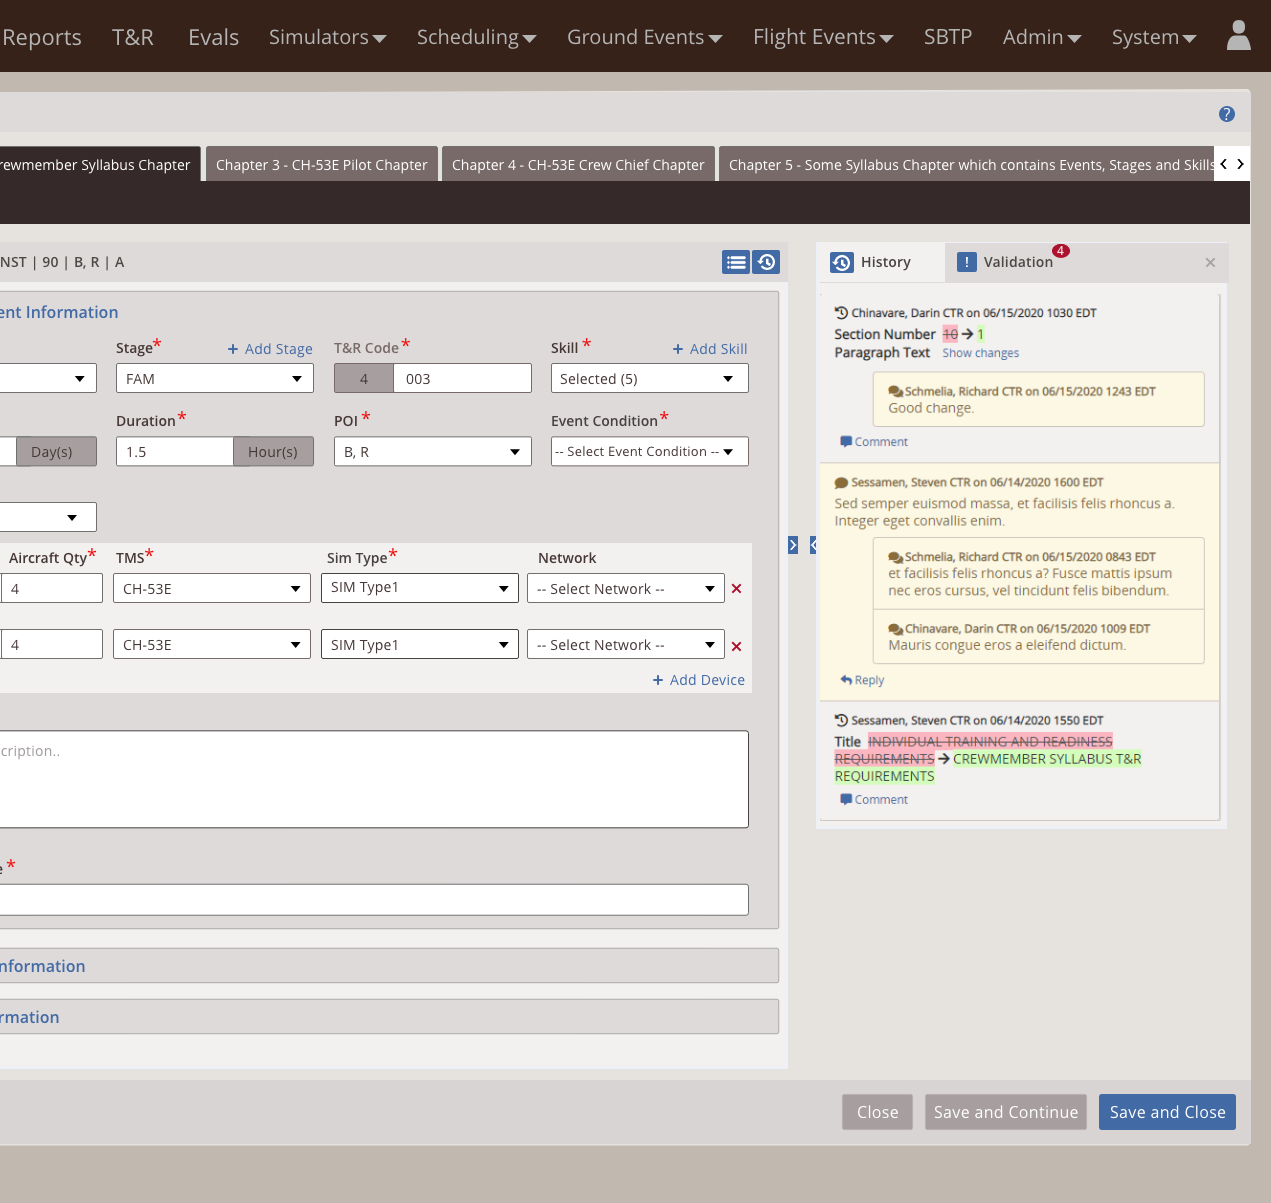
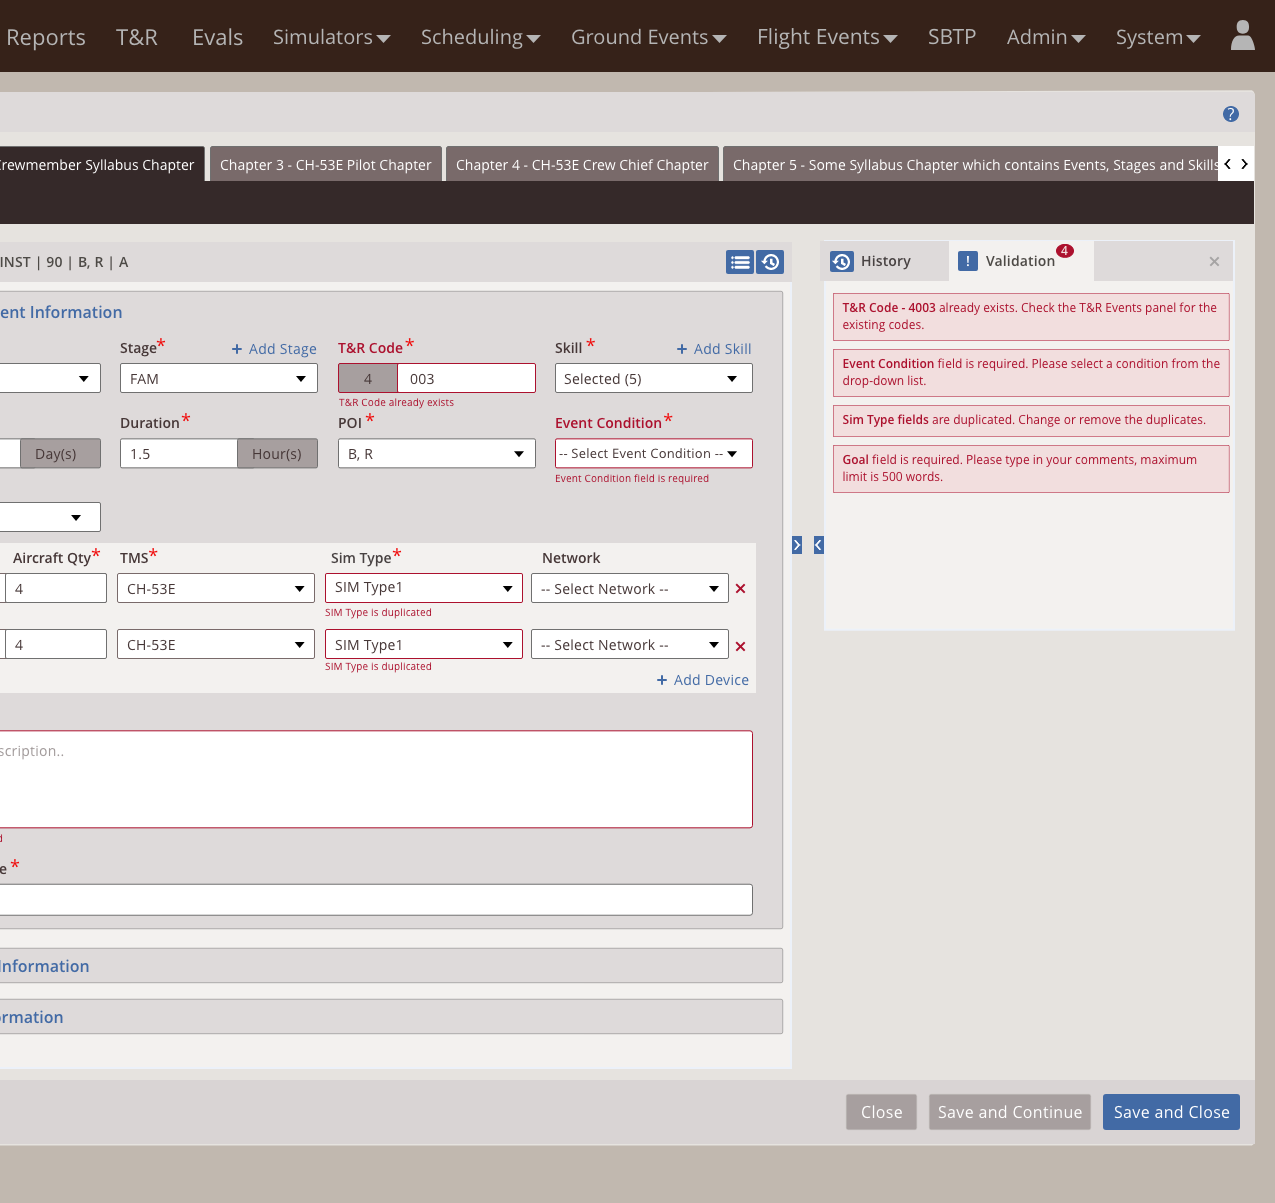
Error Panel (Validation) | Lo-fi design 👆
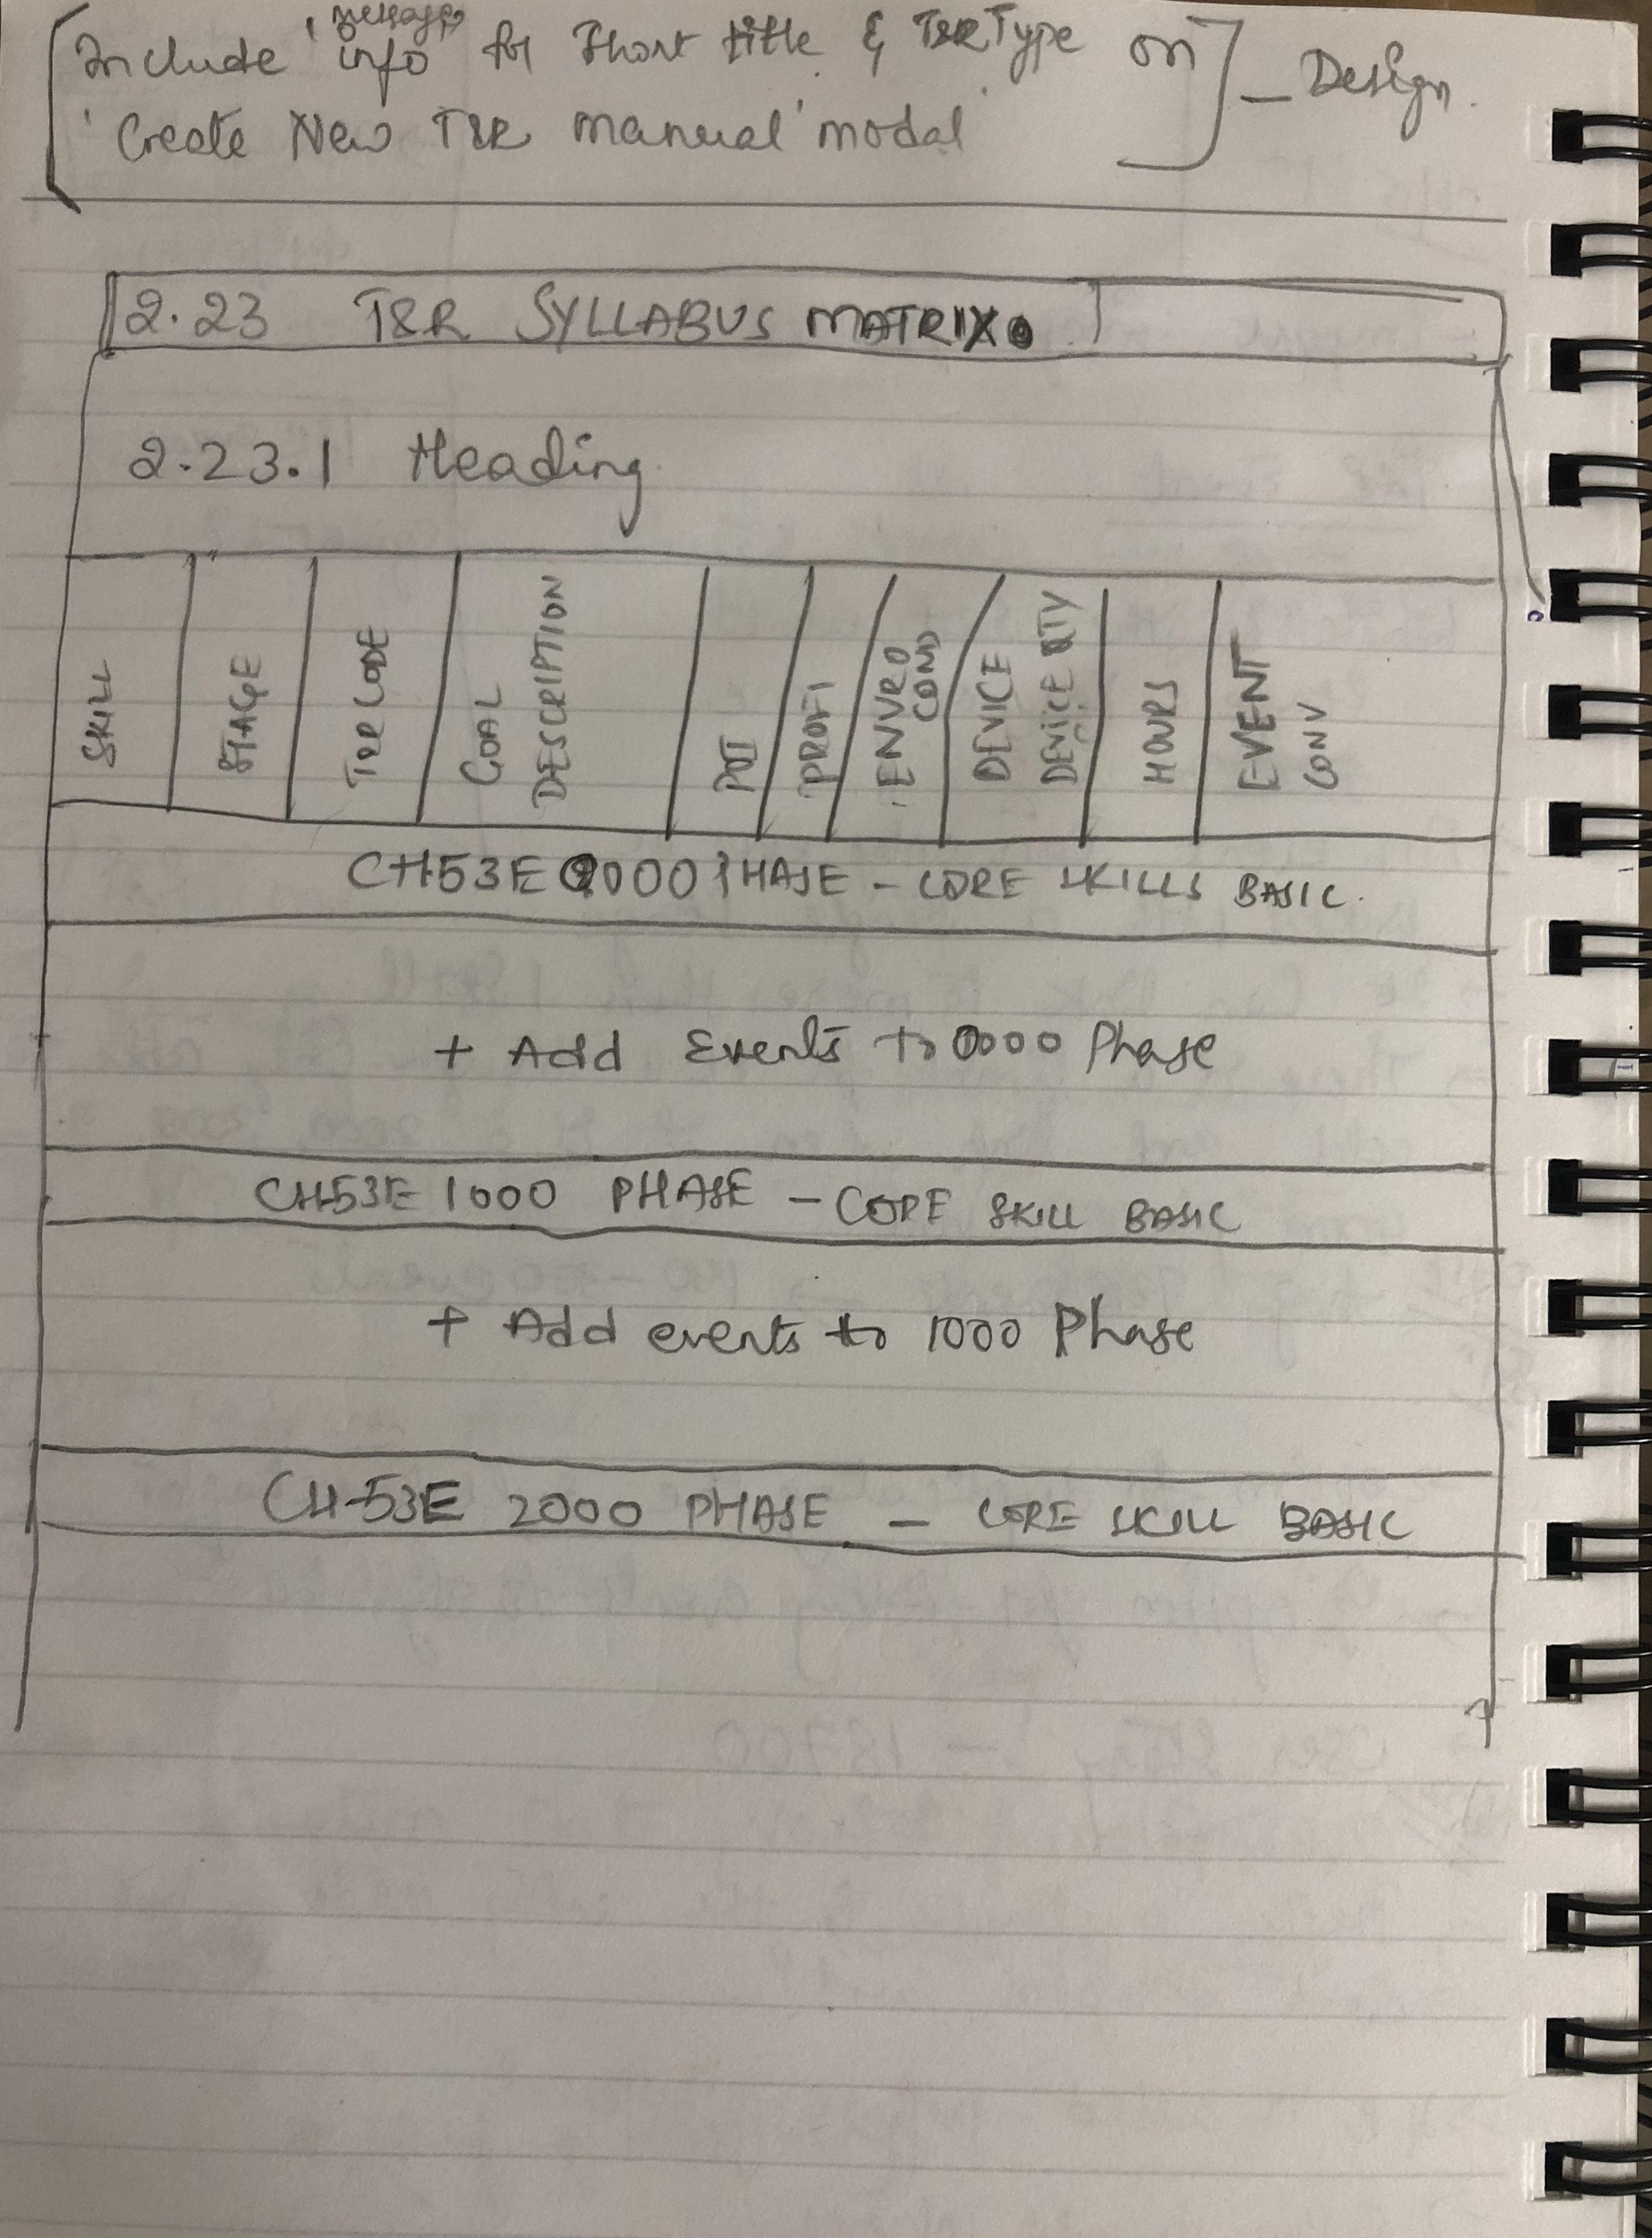
Syllabus Matrix layout | Lo-fi design 👆
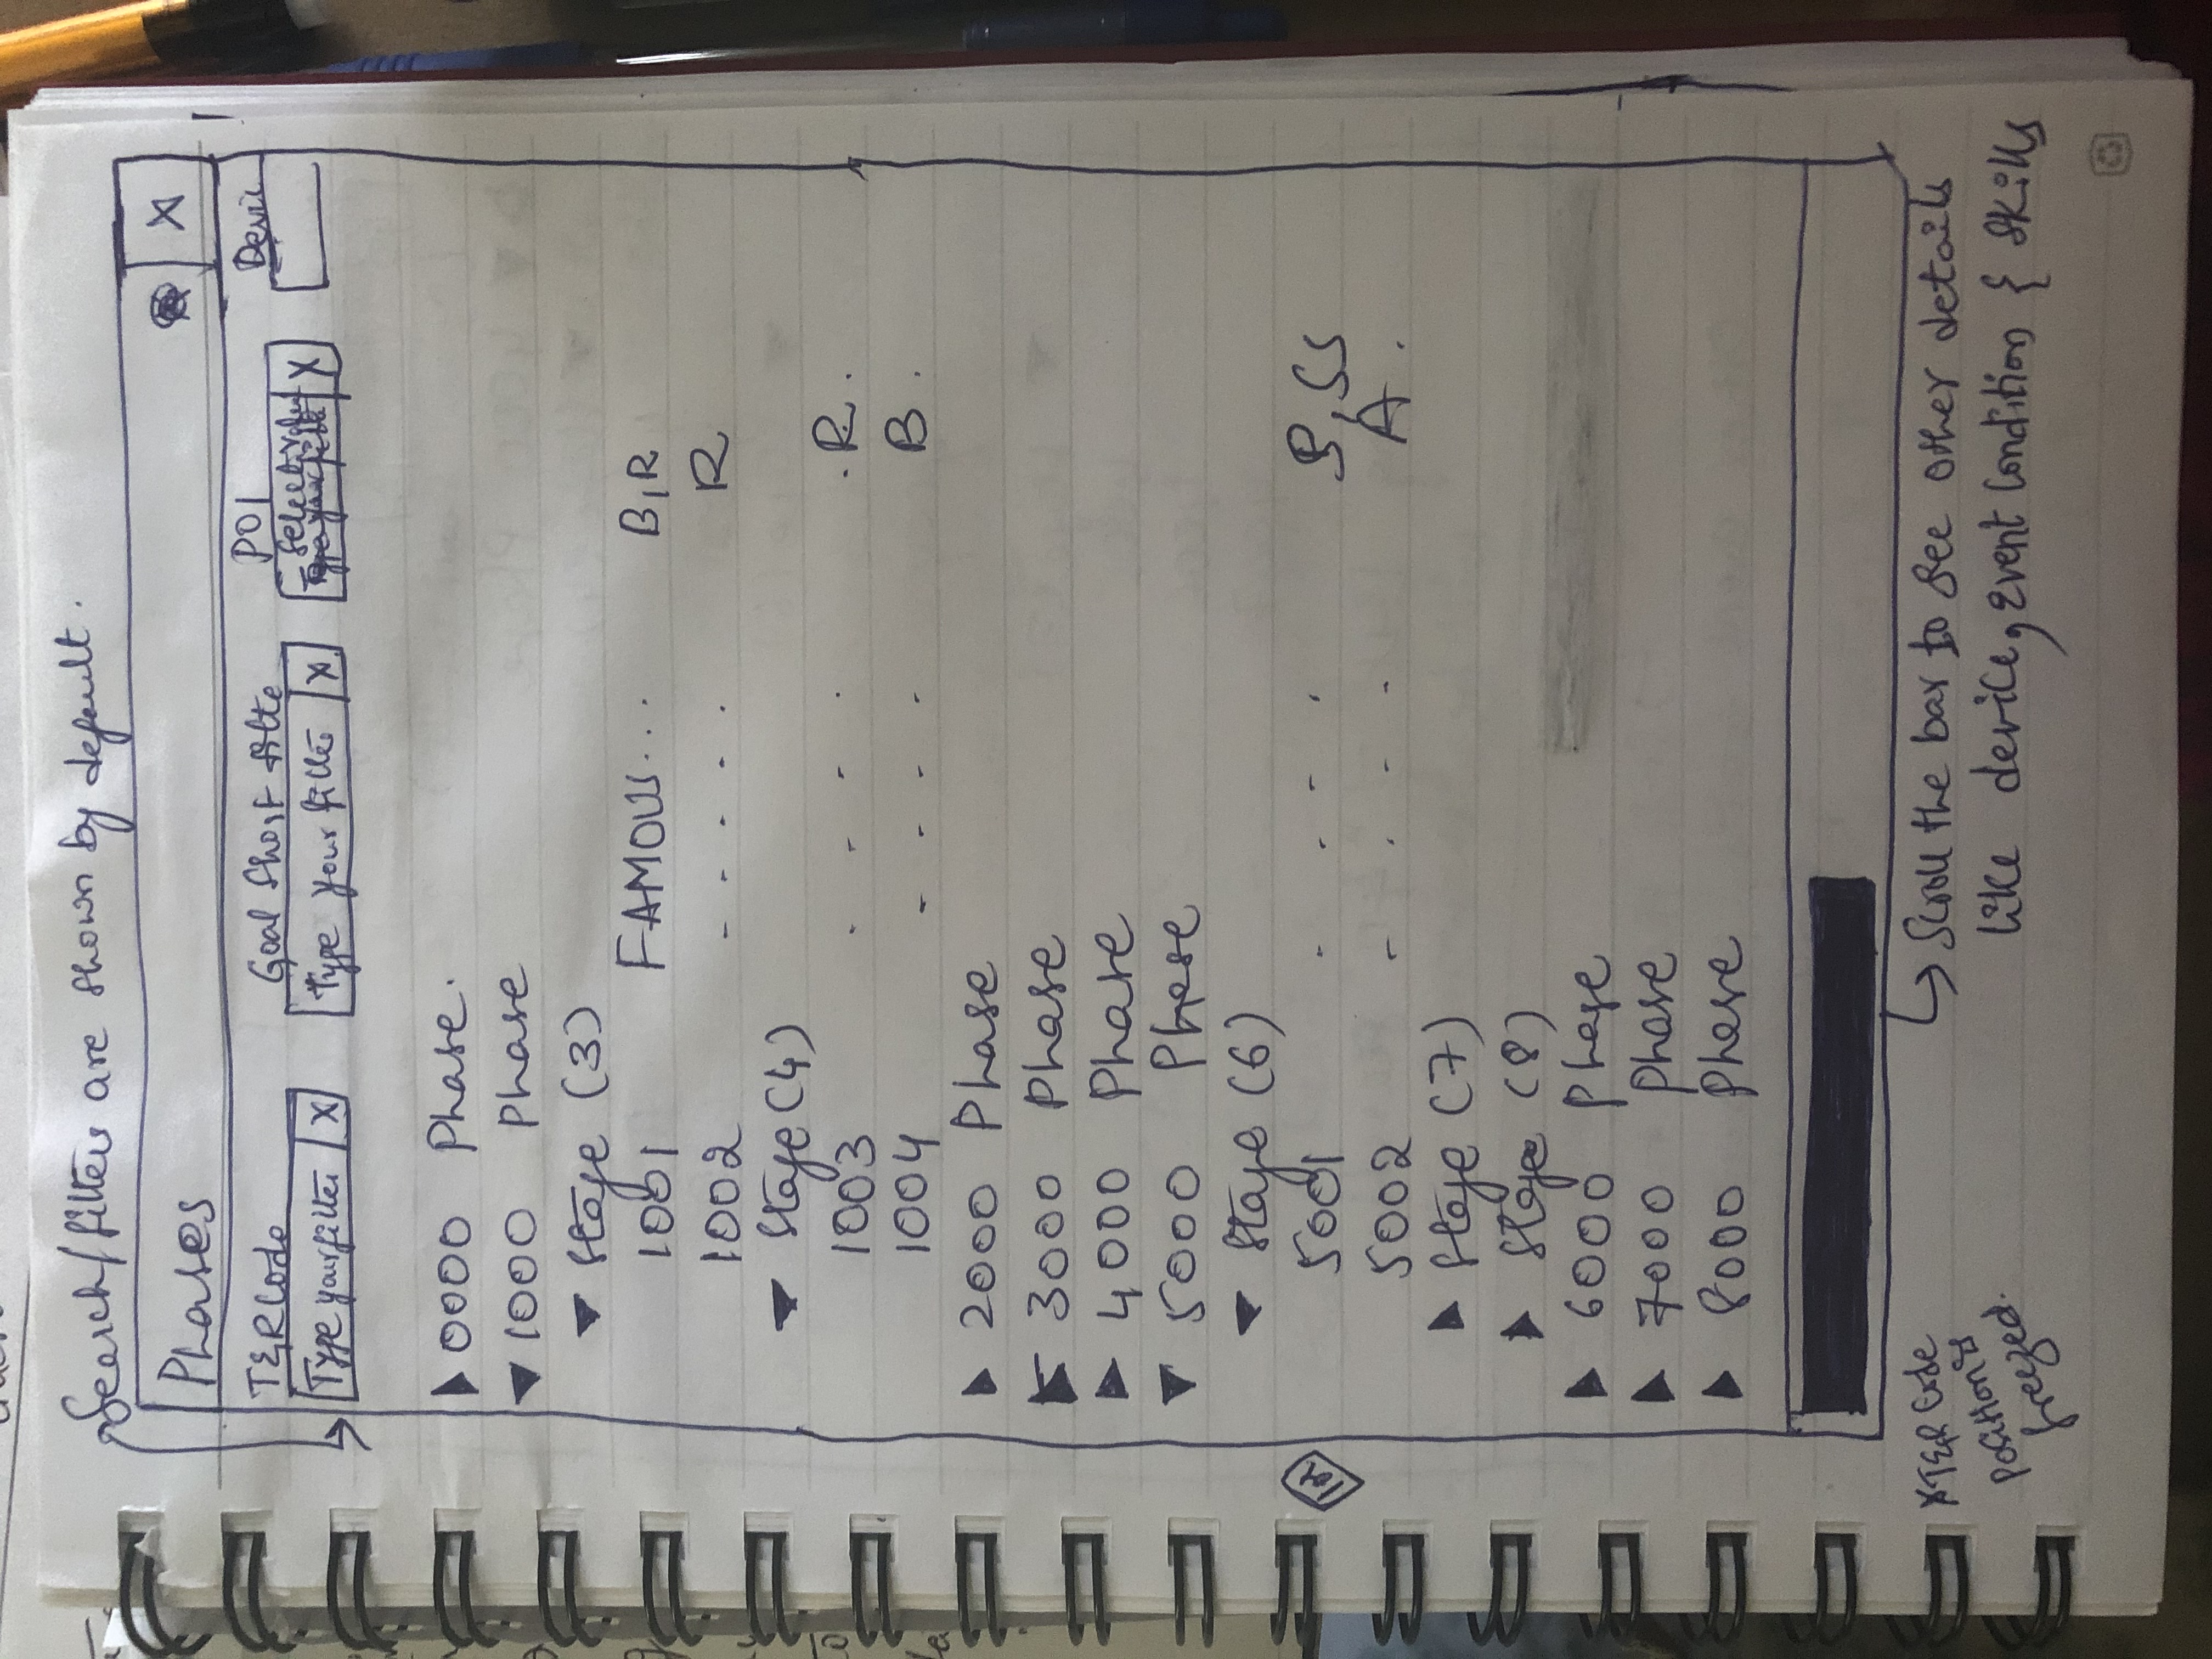
Search and Filters | Lo-fi design 👆
Sections sub-tab | Lo-fi design 👆
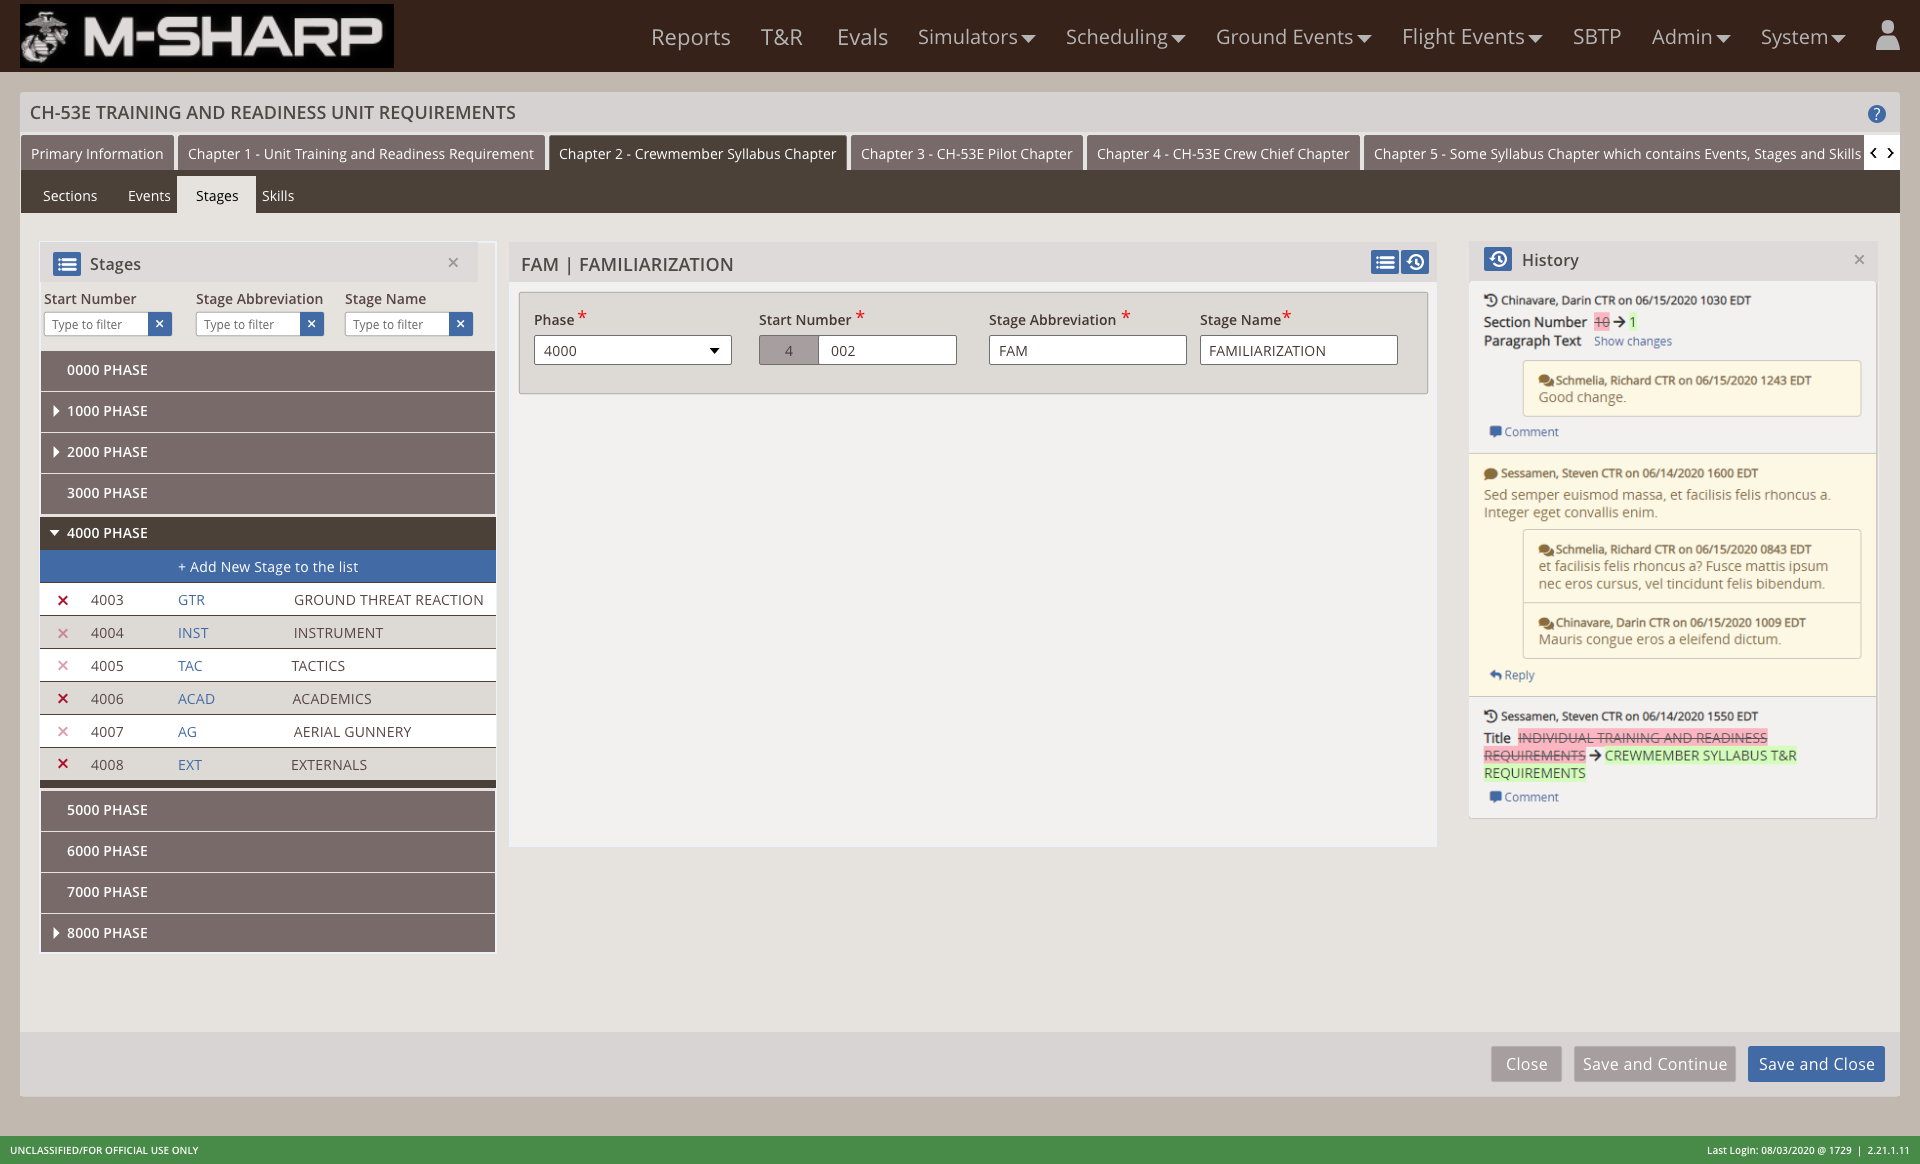
Stages sub-tab | Lo-fi design 👆
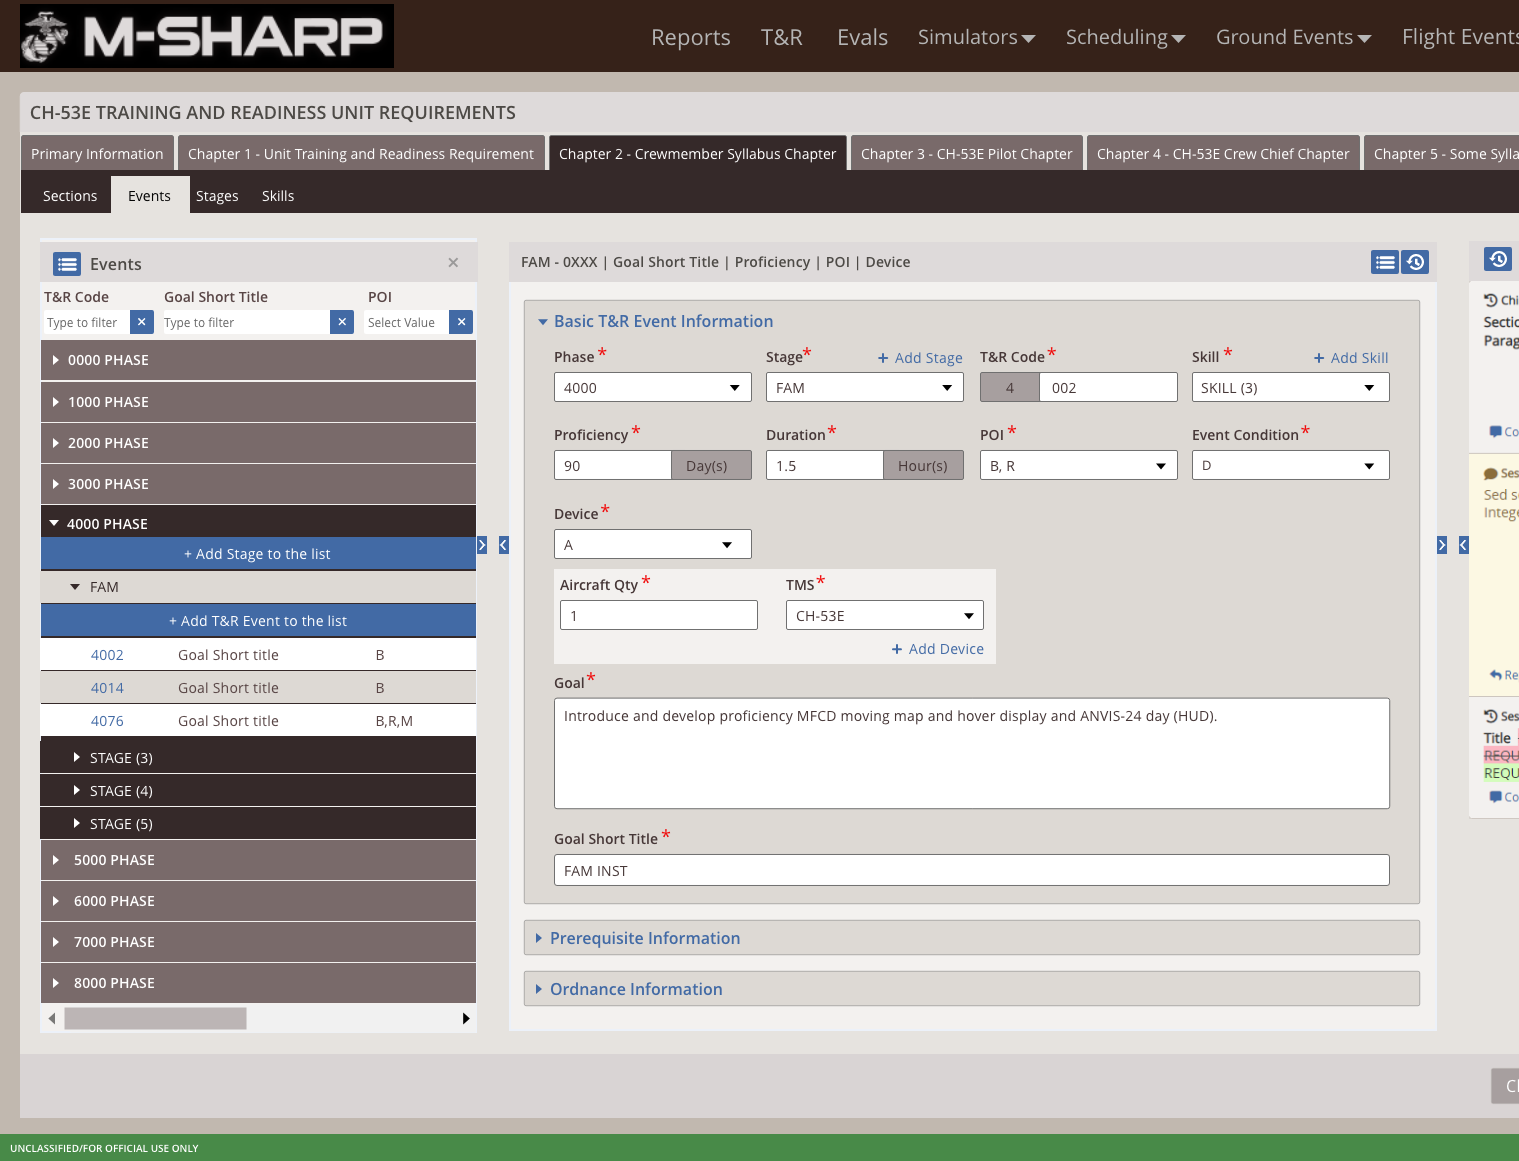
Events sub-tab | Lo-fi design 👆
I test these low-fidelity wireframes with my product owners to collect feedback. I cross check whether the features I designed are aligning with the user requirements or not.
"In order to create the best experience for your user, you need to keep iterating & testing vigorously and I do follow this in my process”
High-fidelity wireframes - Once the low-fidelity wireframes are approved by the Product Owner, I design high-fidelity wireframes and prototypes using Adobe XD. From this point, I focus on the visuals and user flow of the software and finally demonstrate the designs to the developers and product owners for further feedback. In the next section, you can look at some of the key features that I've designed.
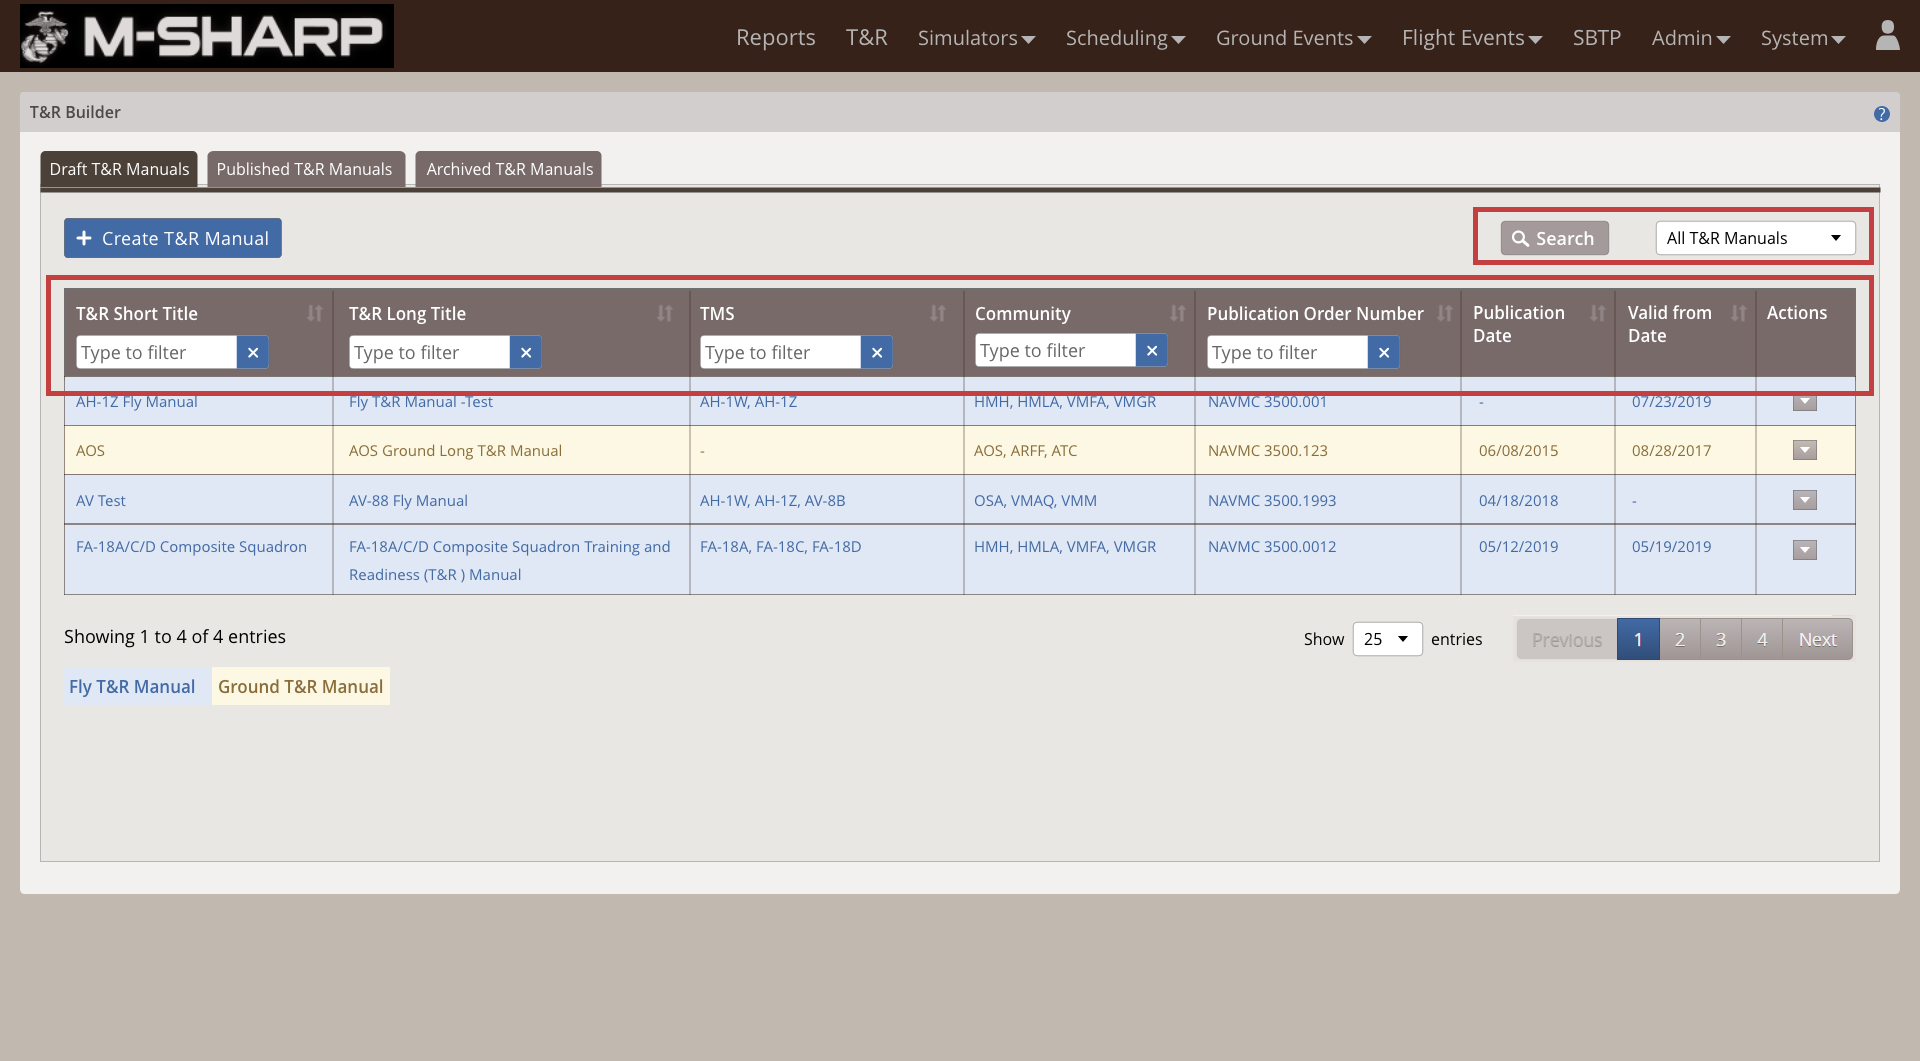
I structured the homepage into 3 tabs(Draft, Published and Archived) based on how a T&R manual is processed rather than showing the whole list of manuals at the same place.
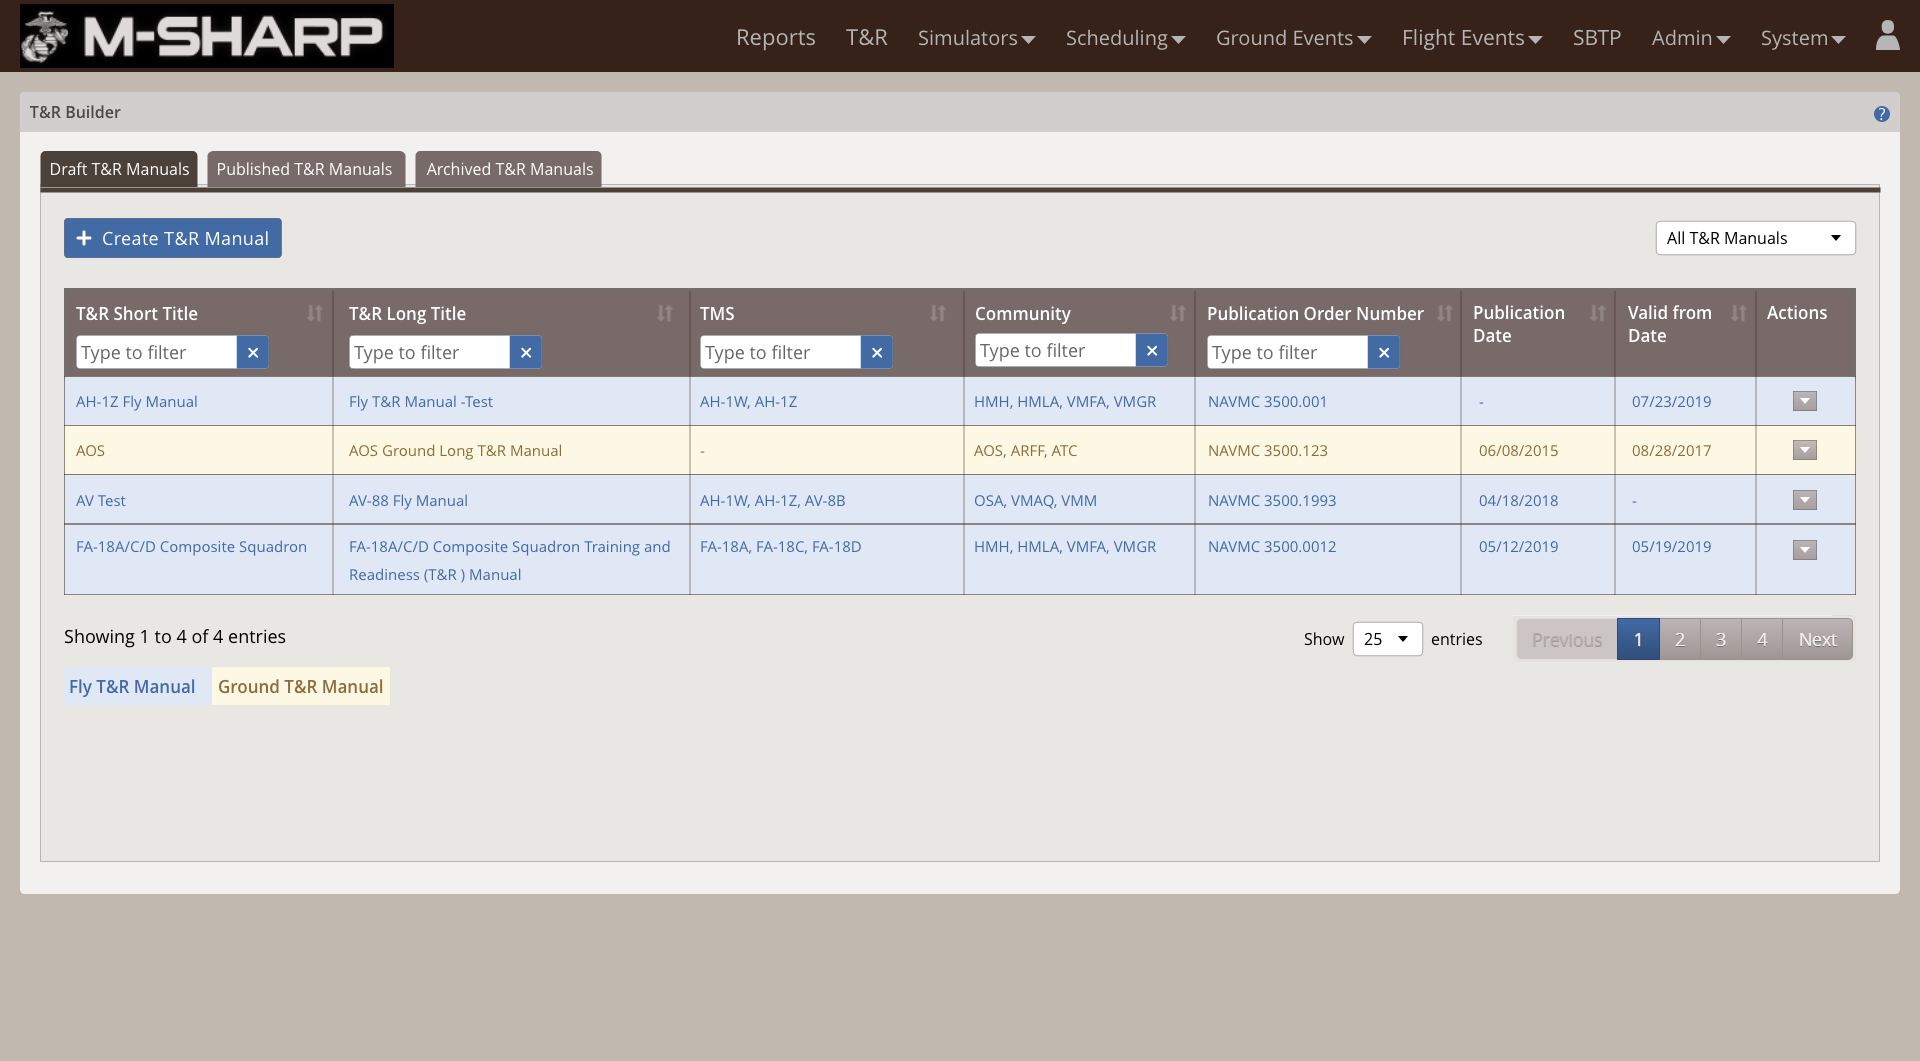
From my research I found out that there are 2 types of T&R Manuals : Fly and Ground and different commanders work on both the manuals.
So to make it easy for them to look at the list, I differentiated Fly and ground manuals by color coding the background row & text. Provided a legend at the bottom for a first time user to understand the color code.
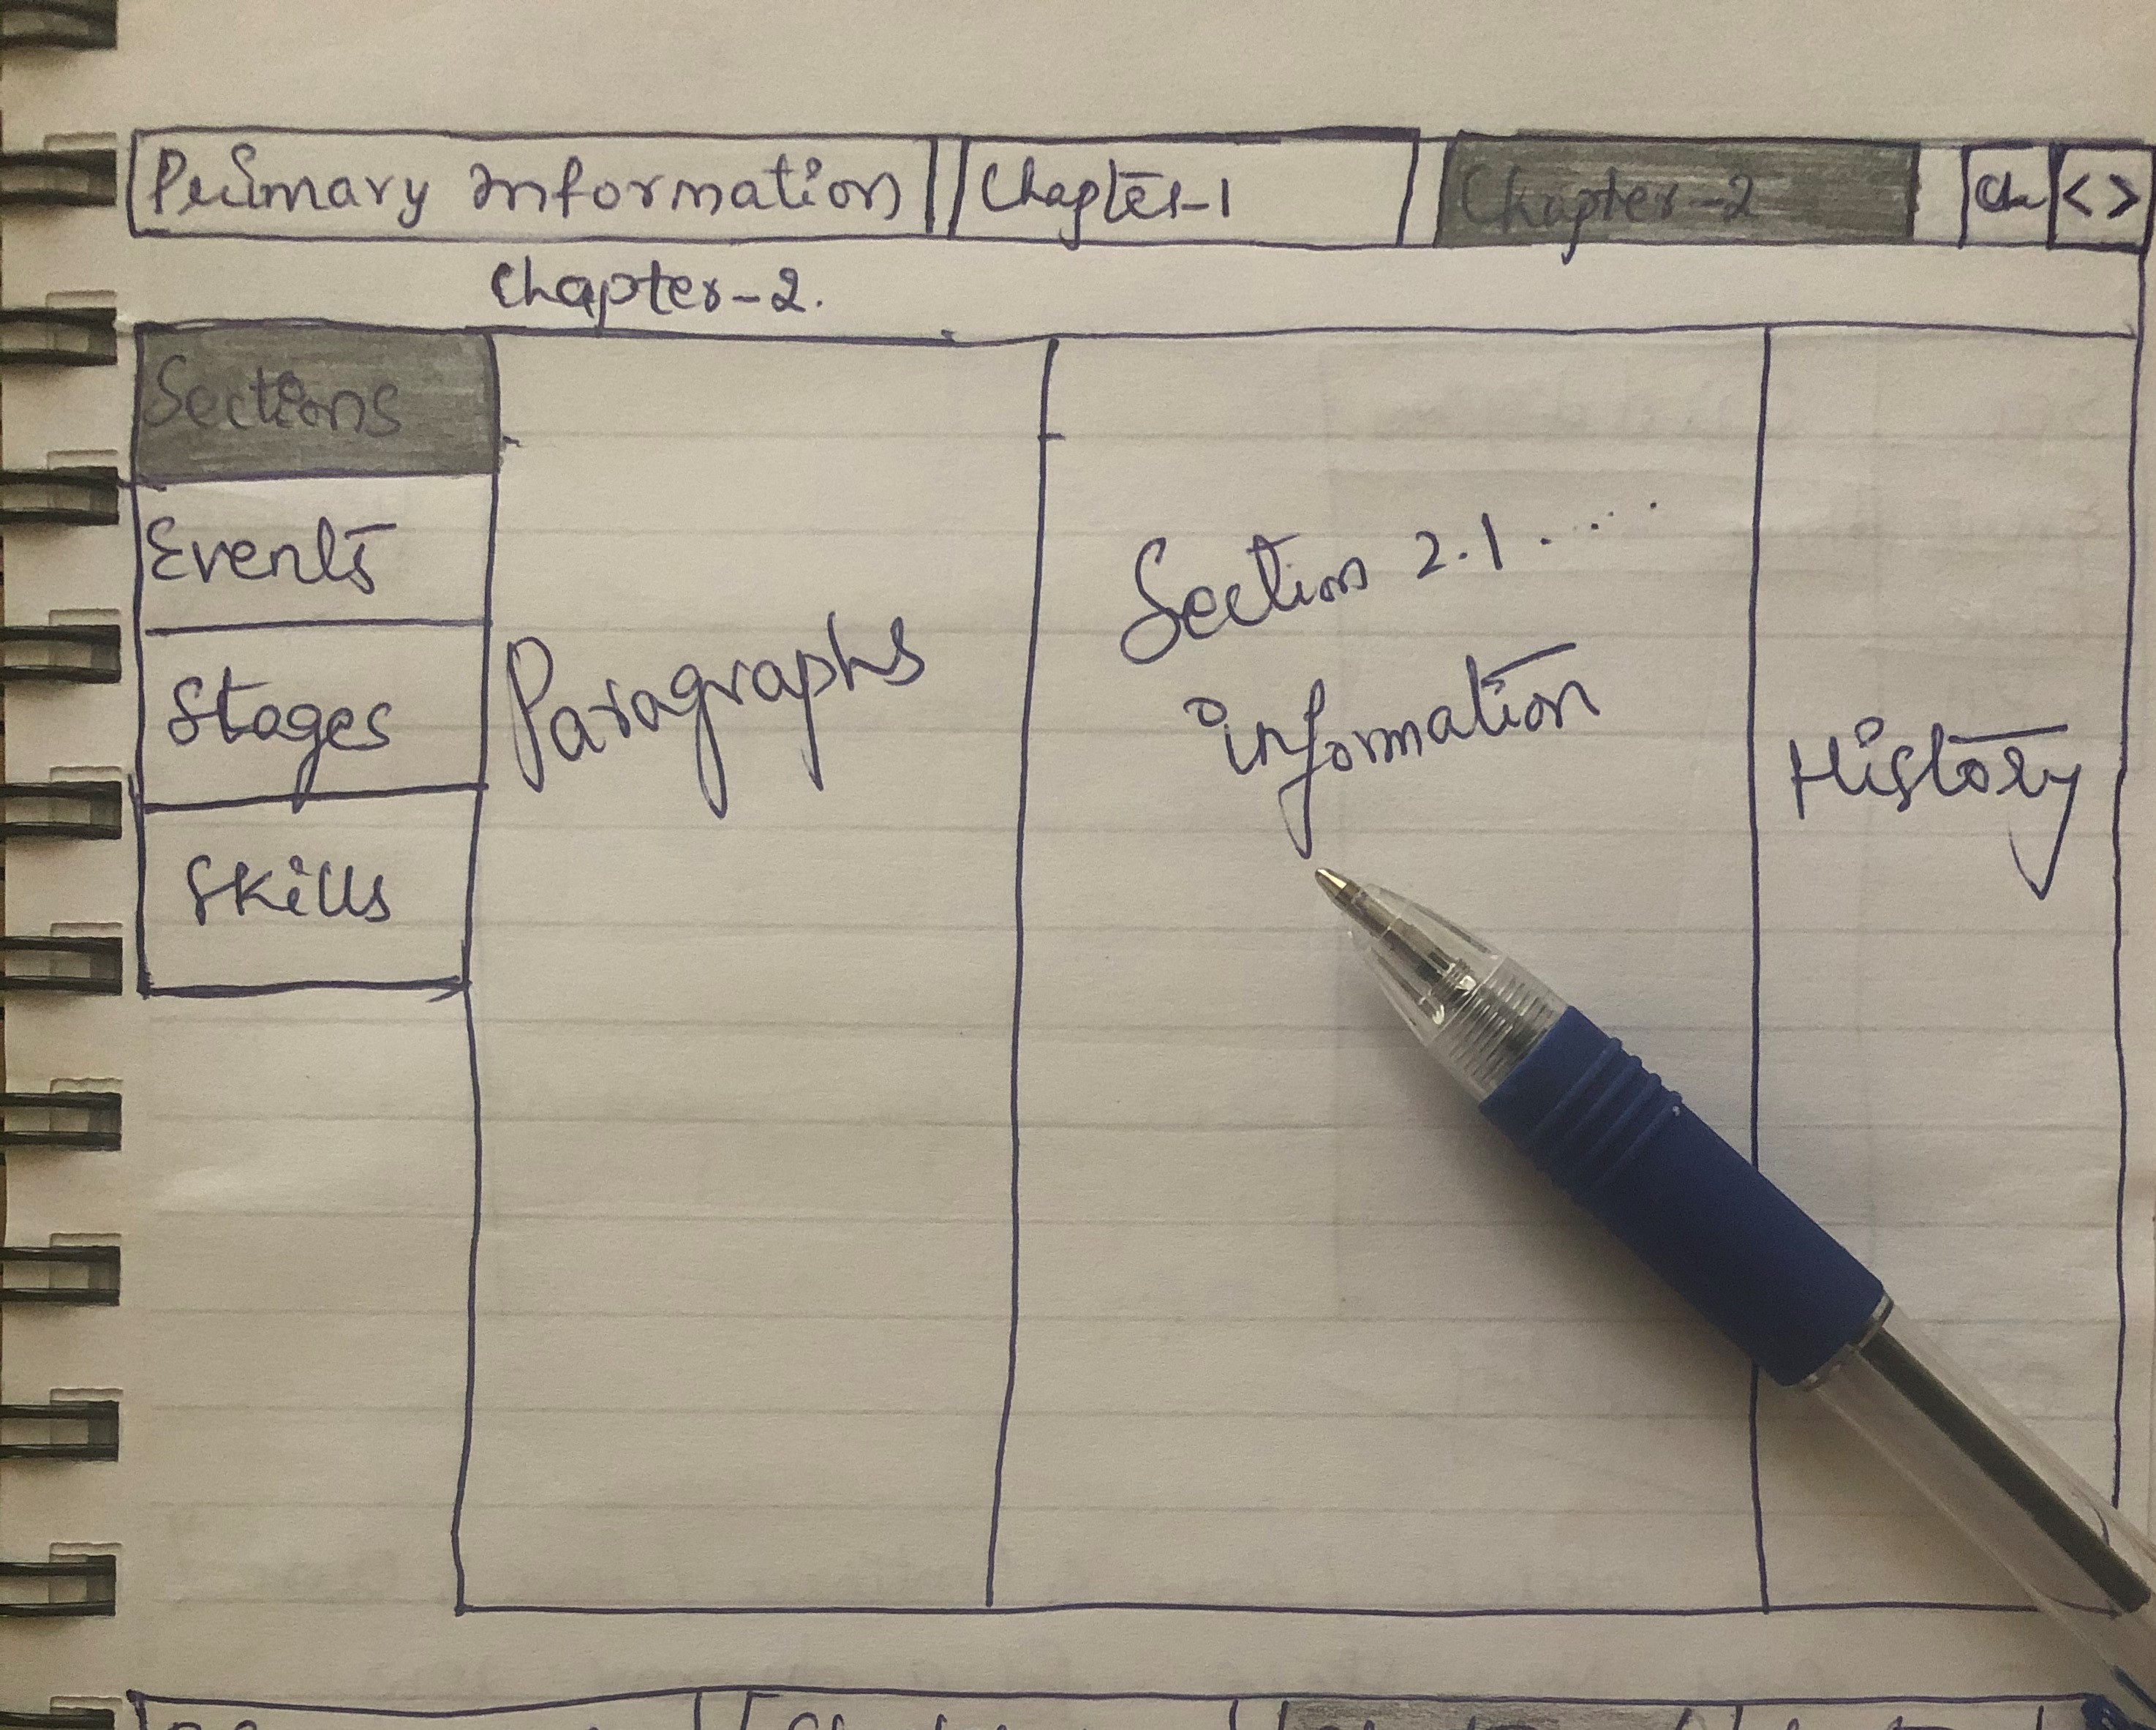
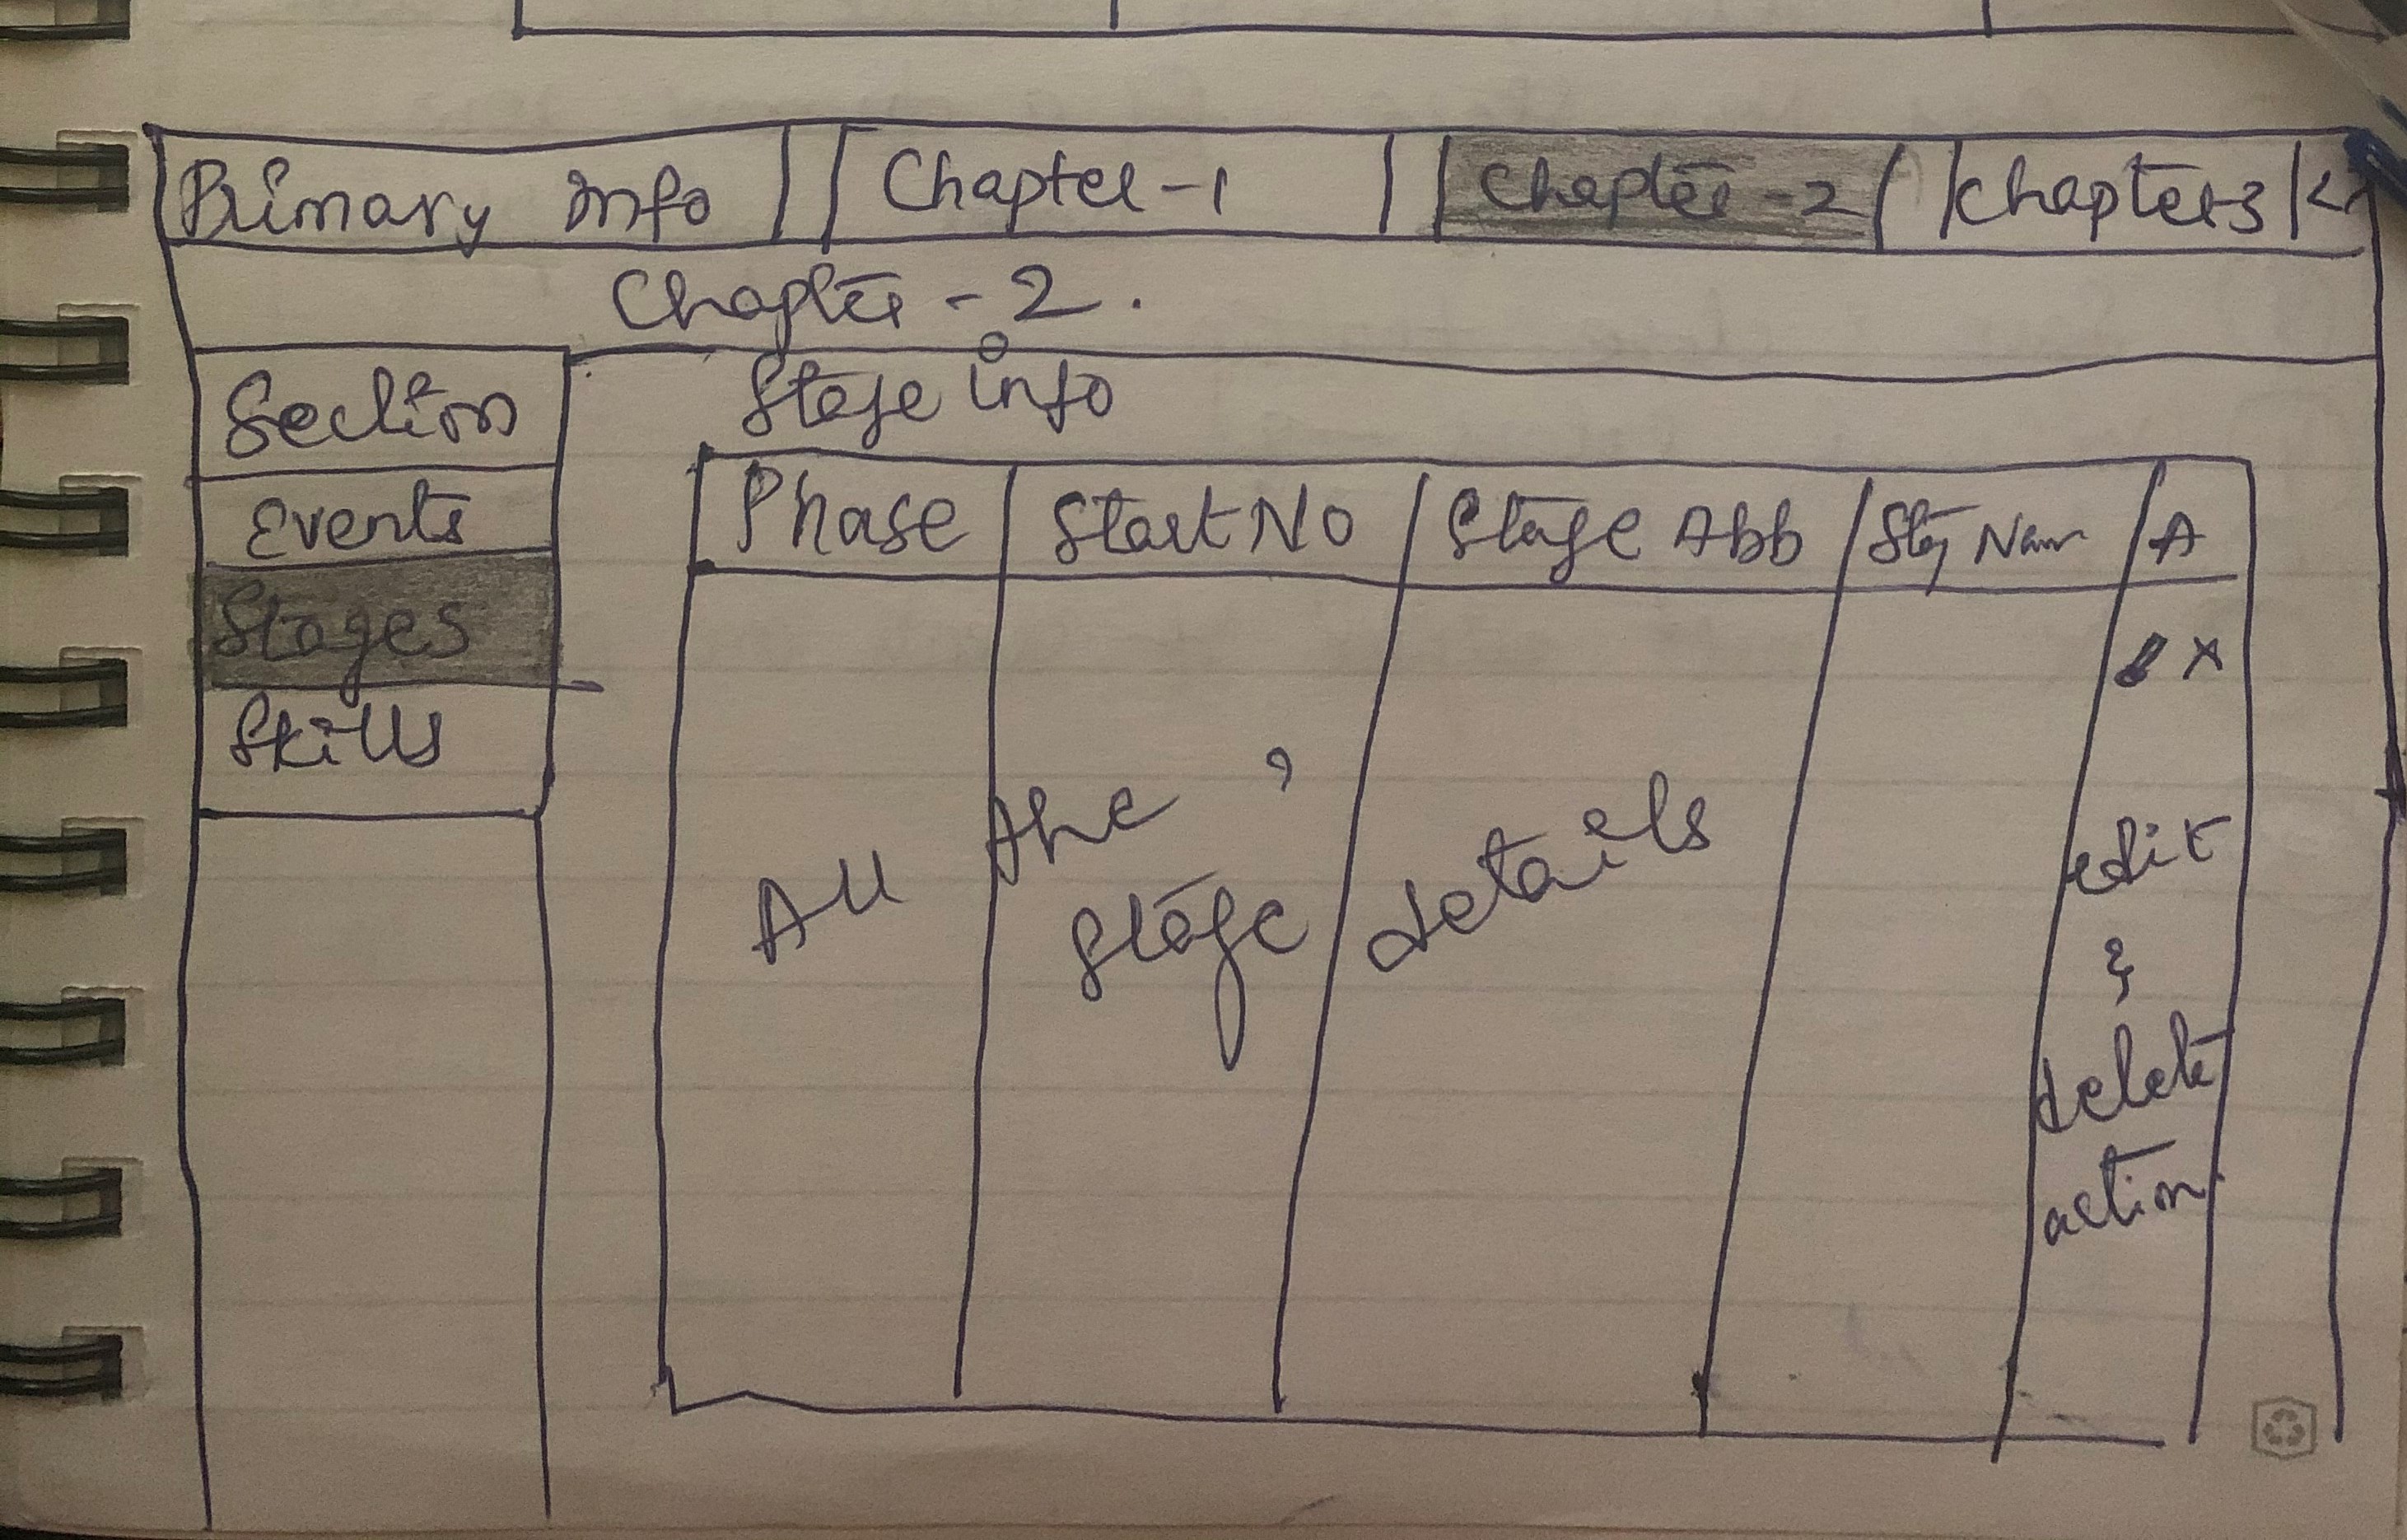
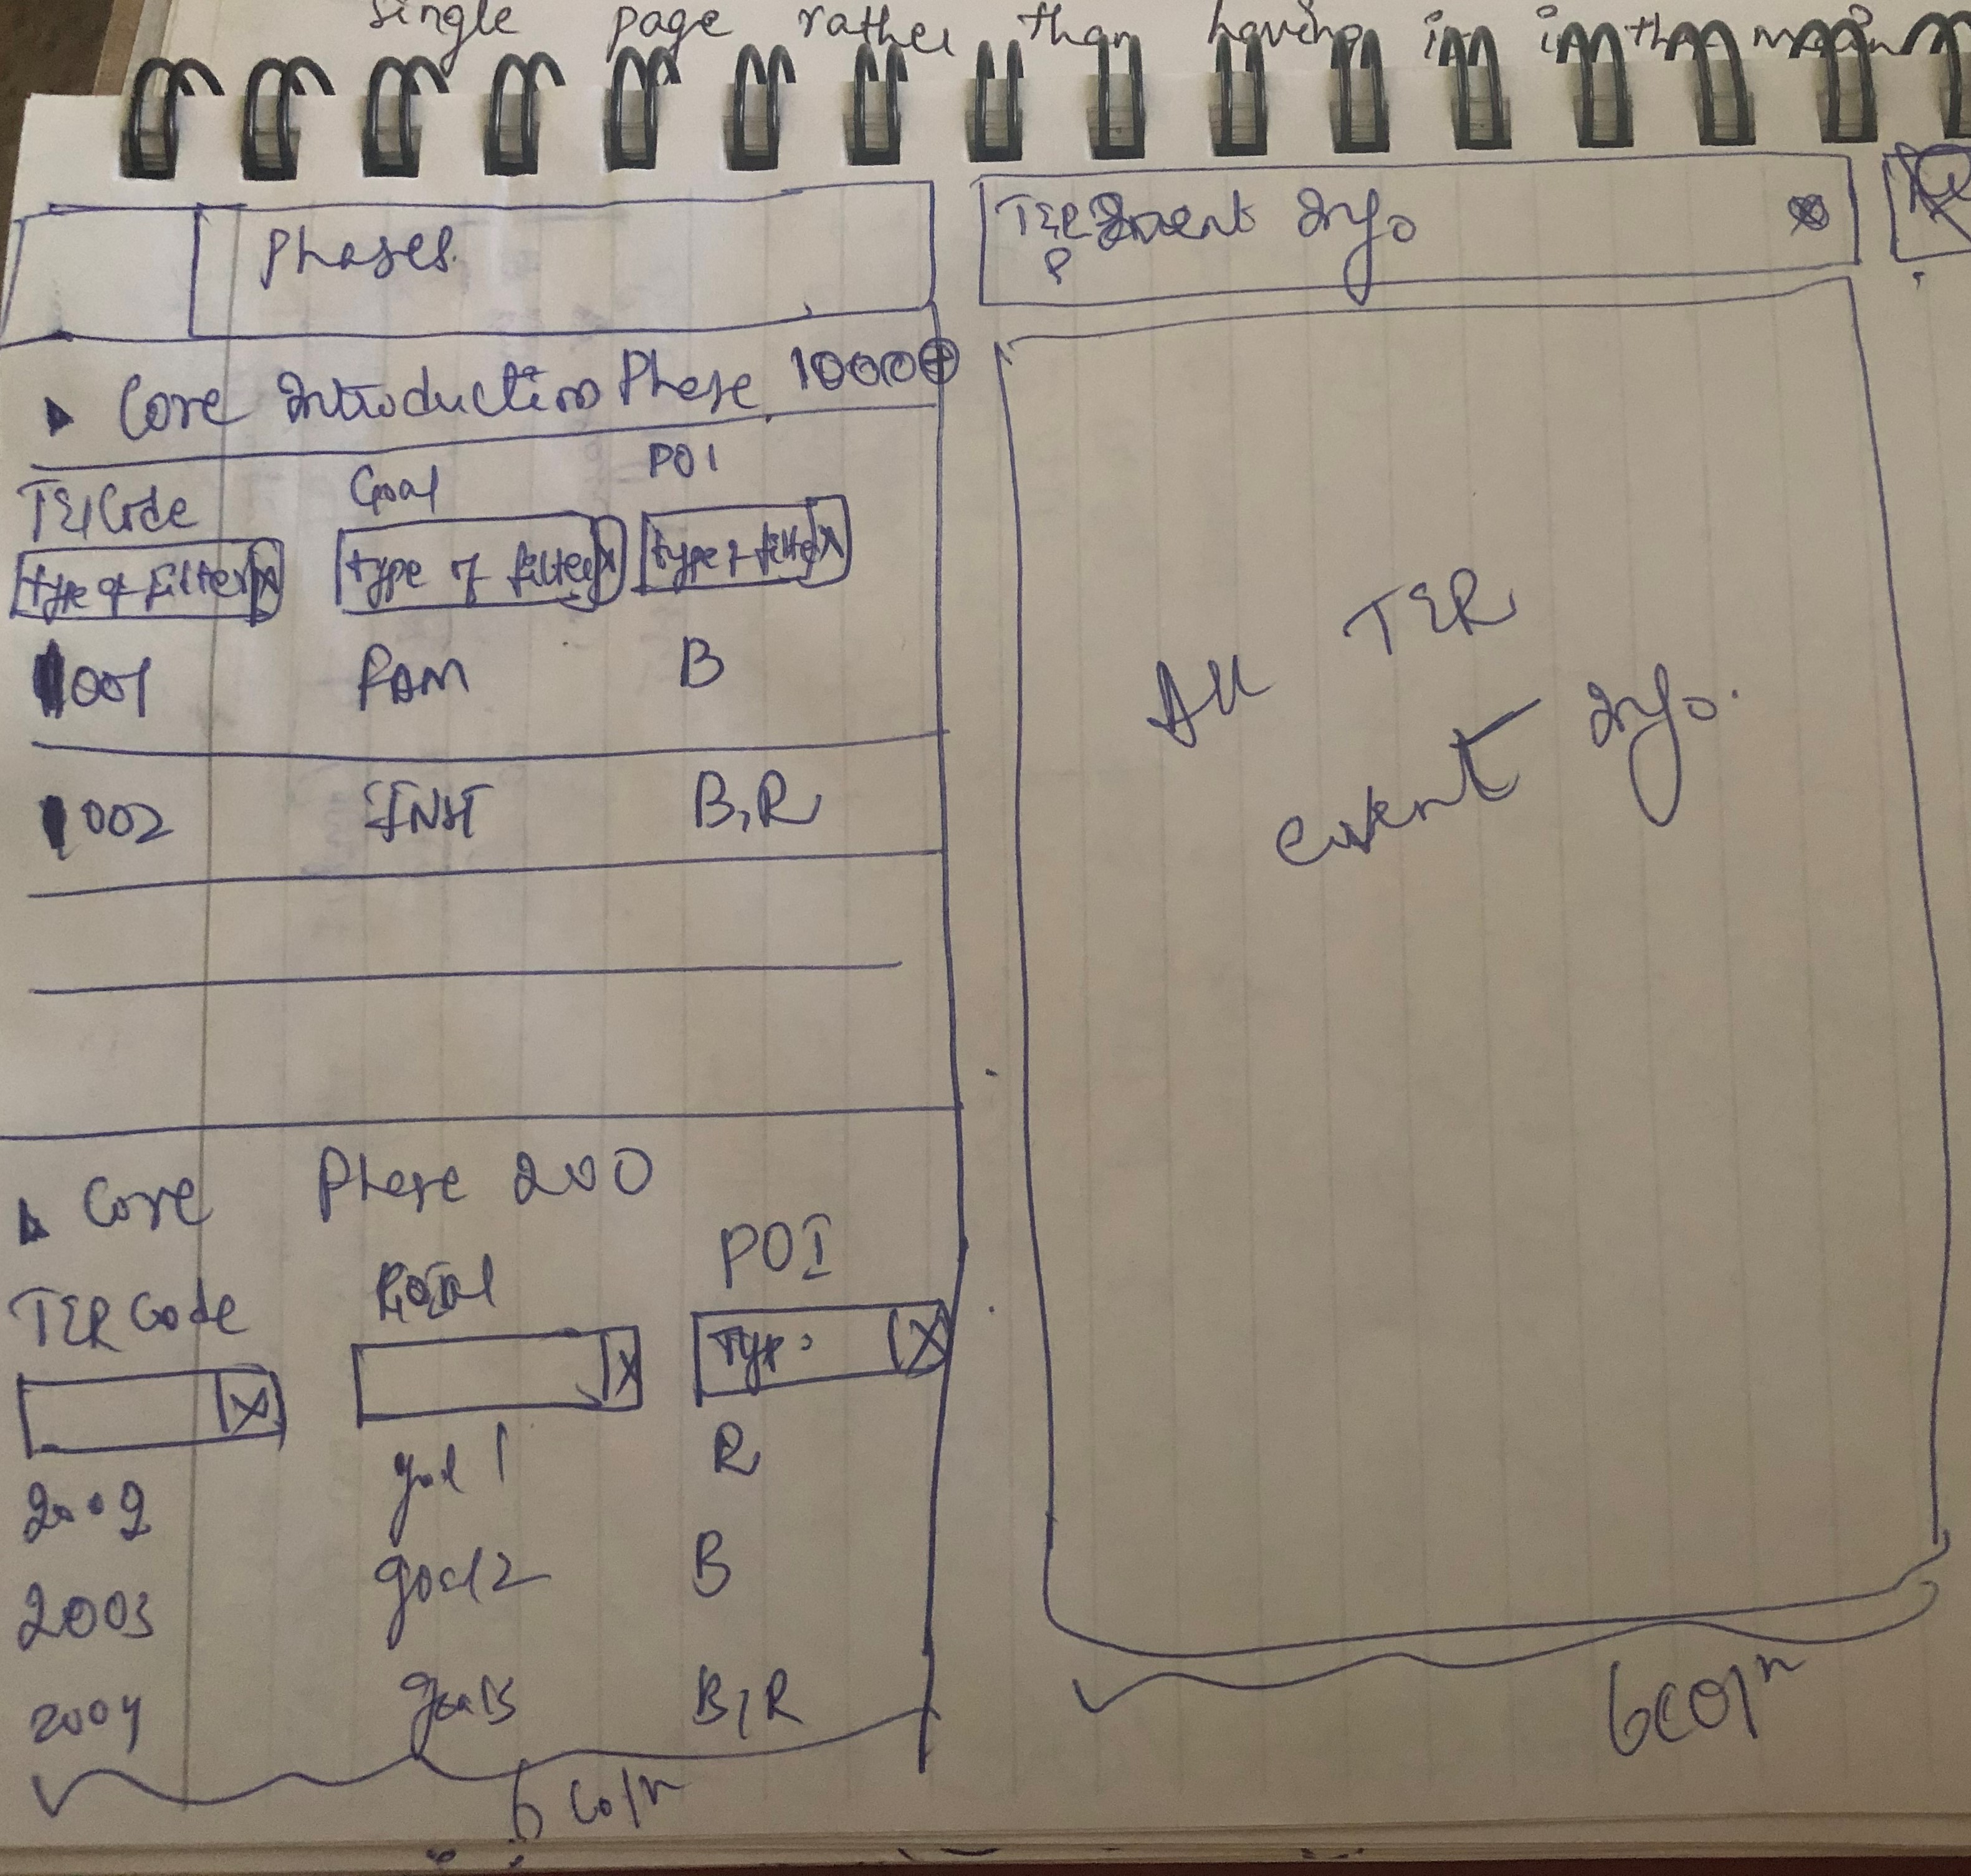
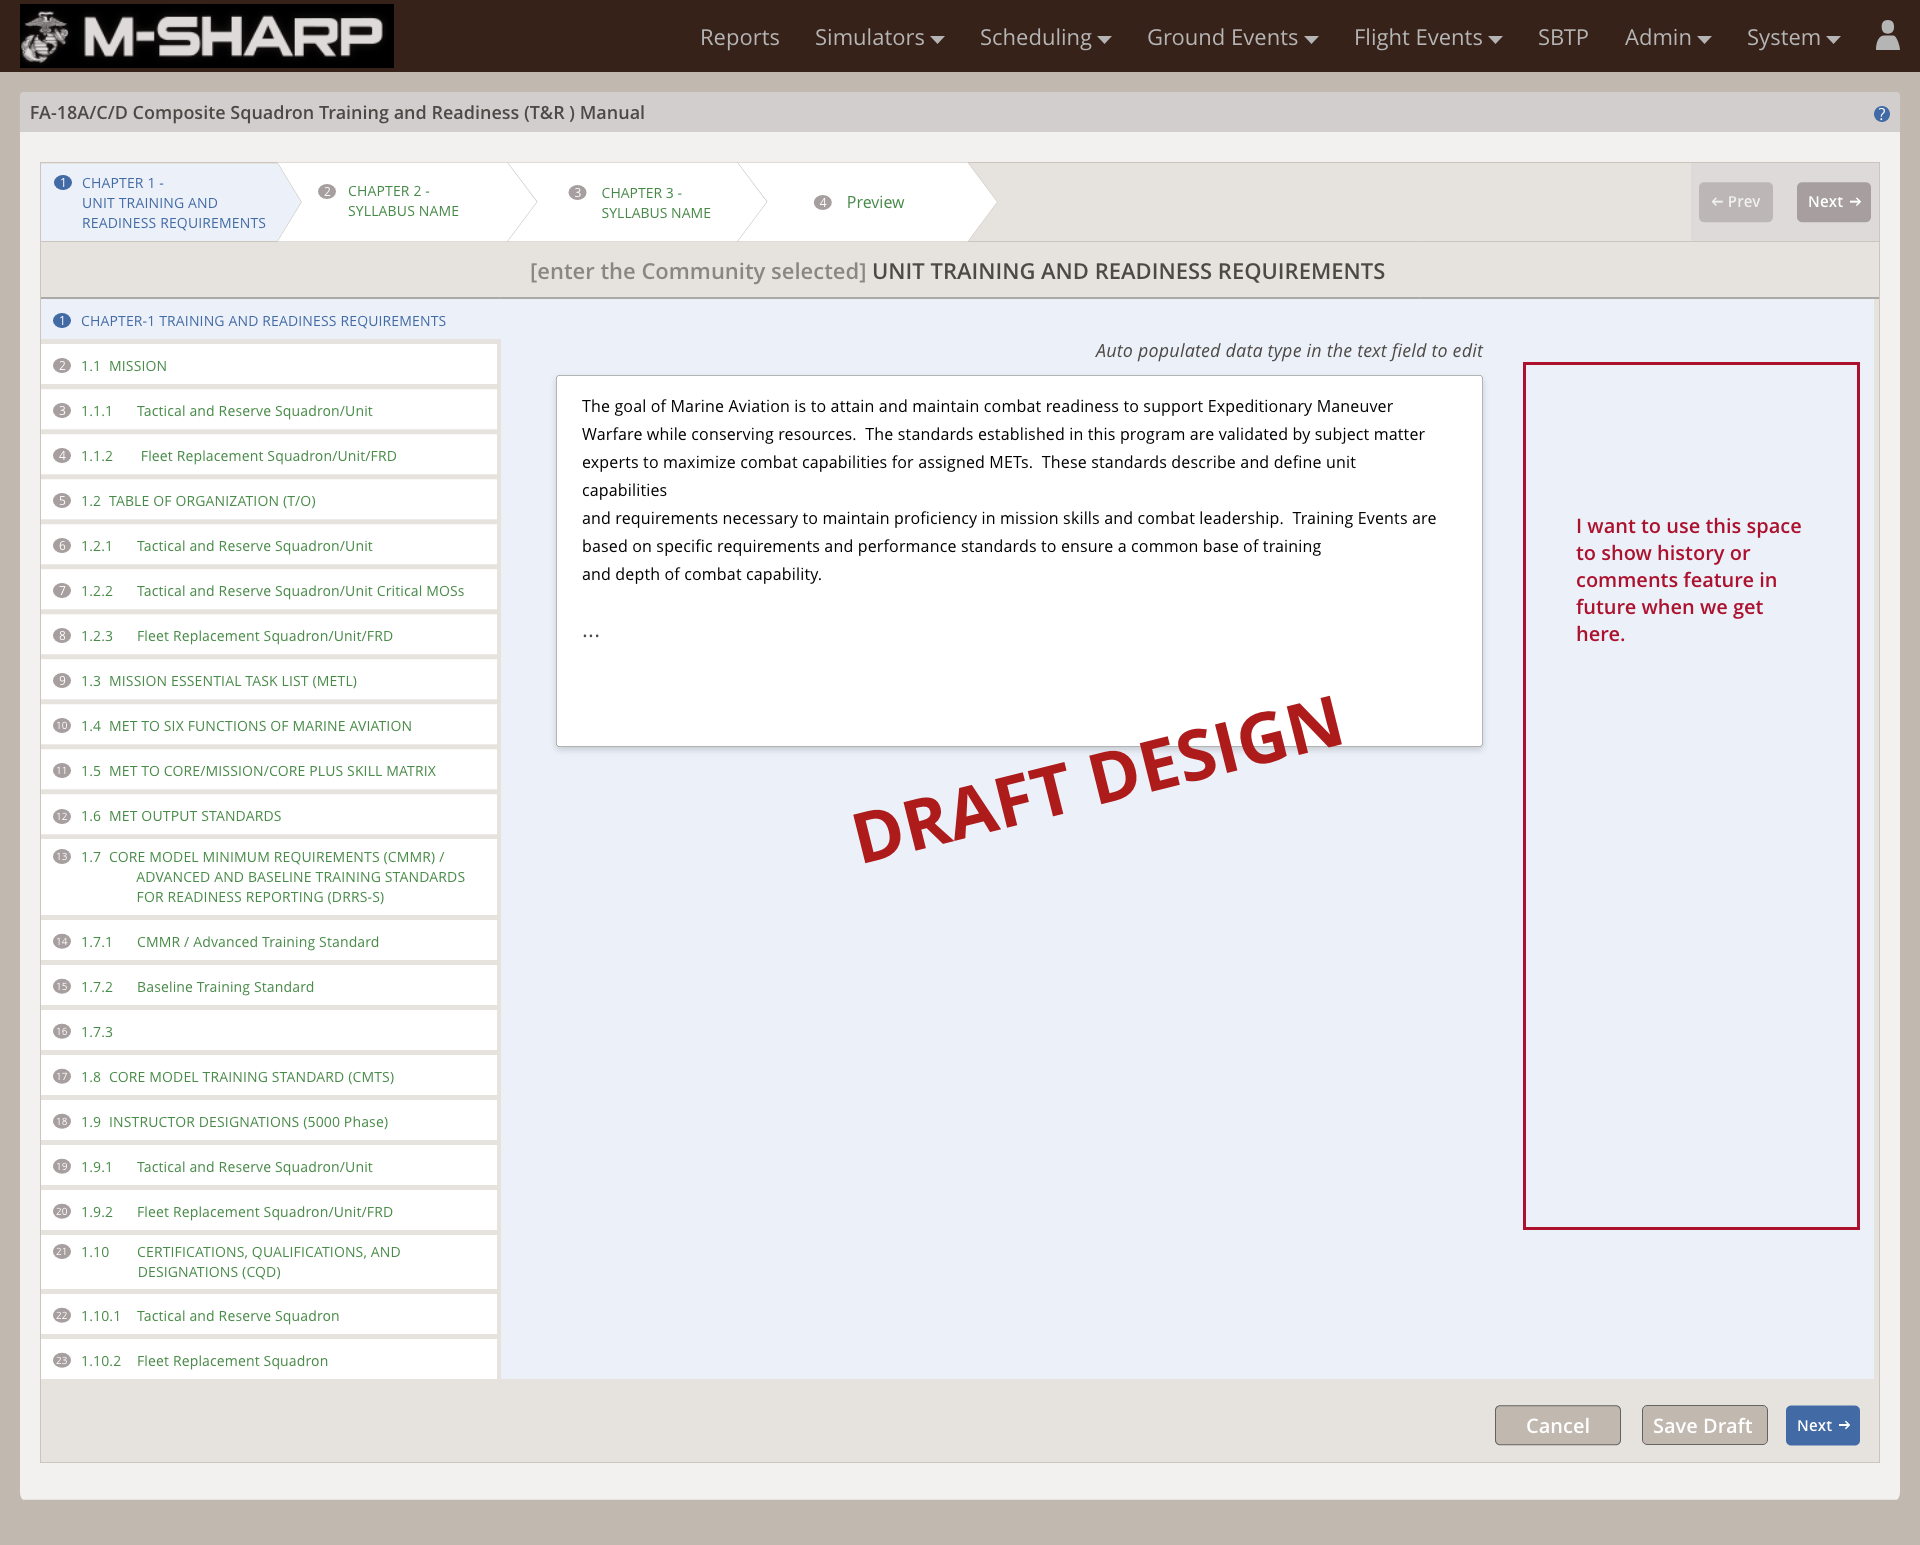
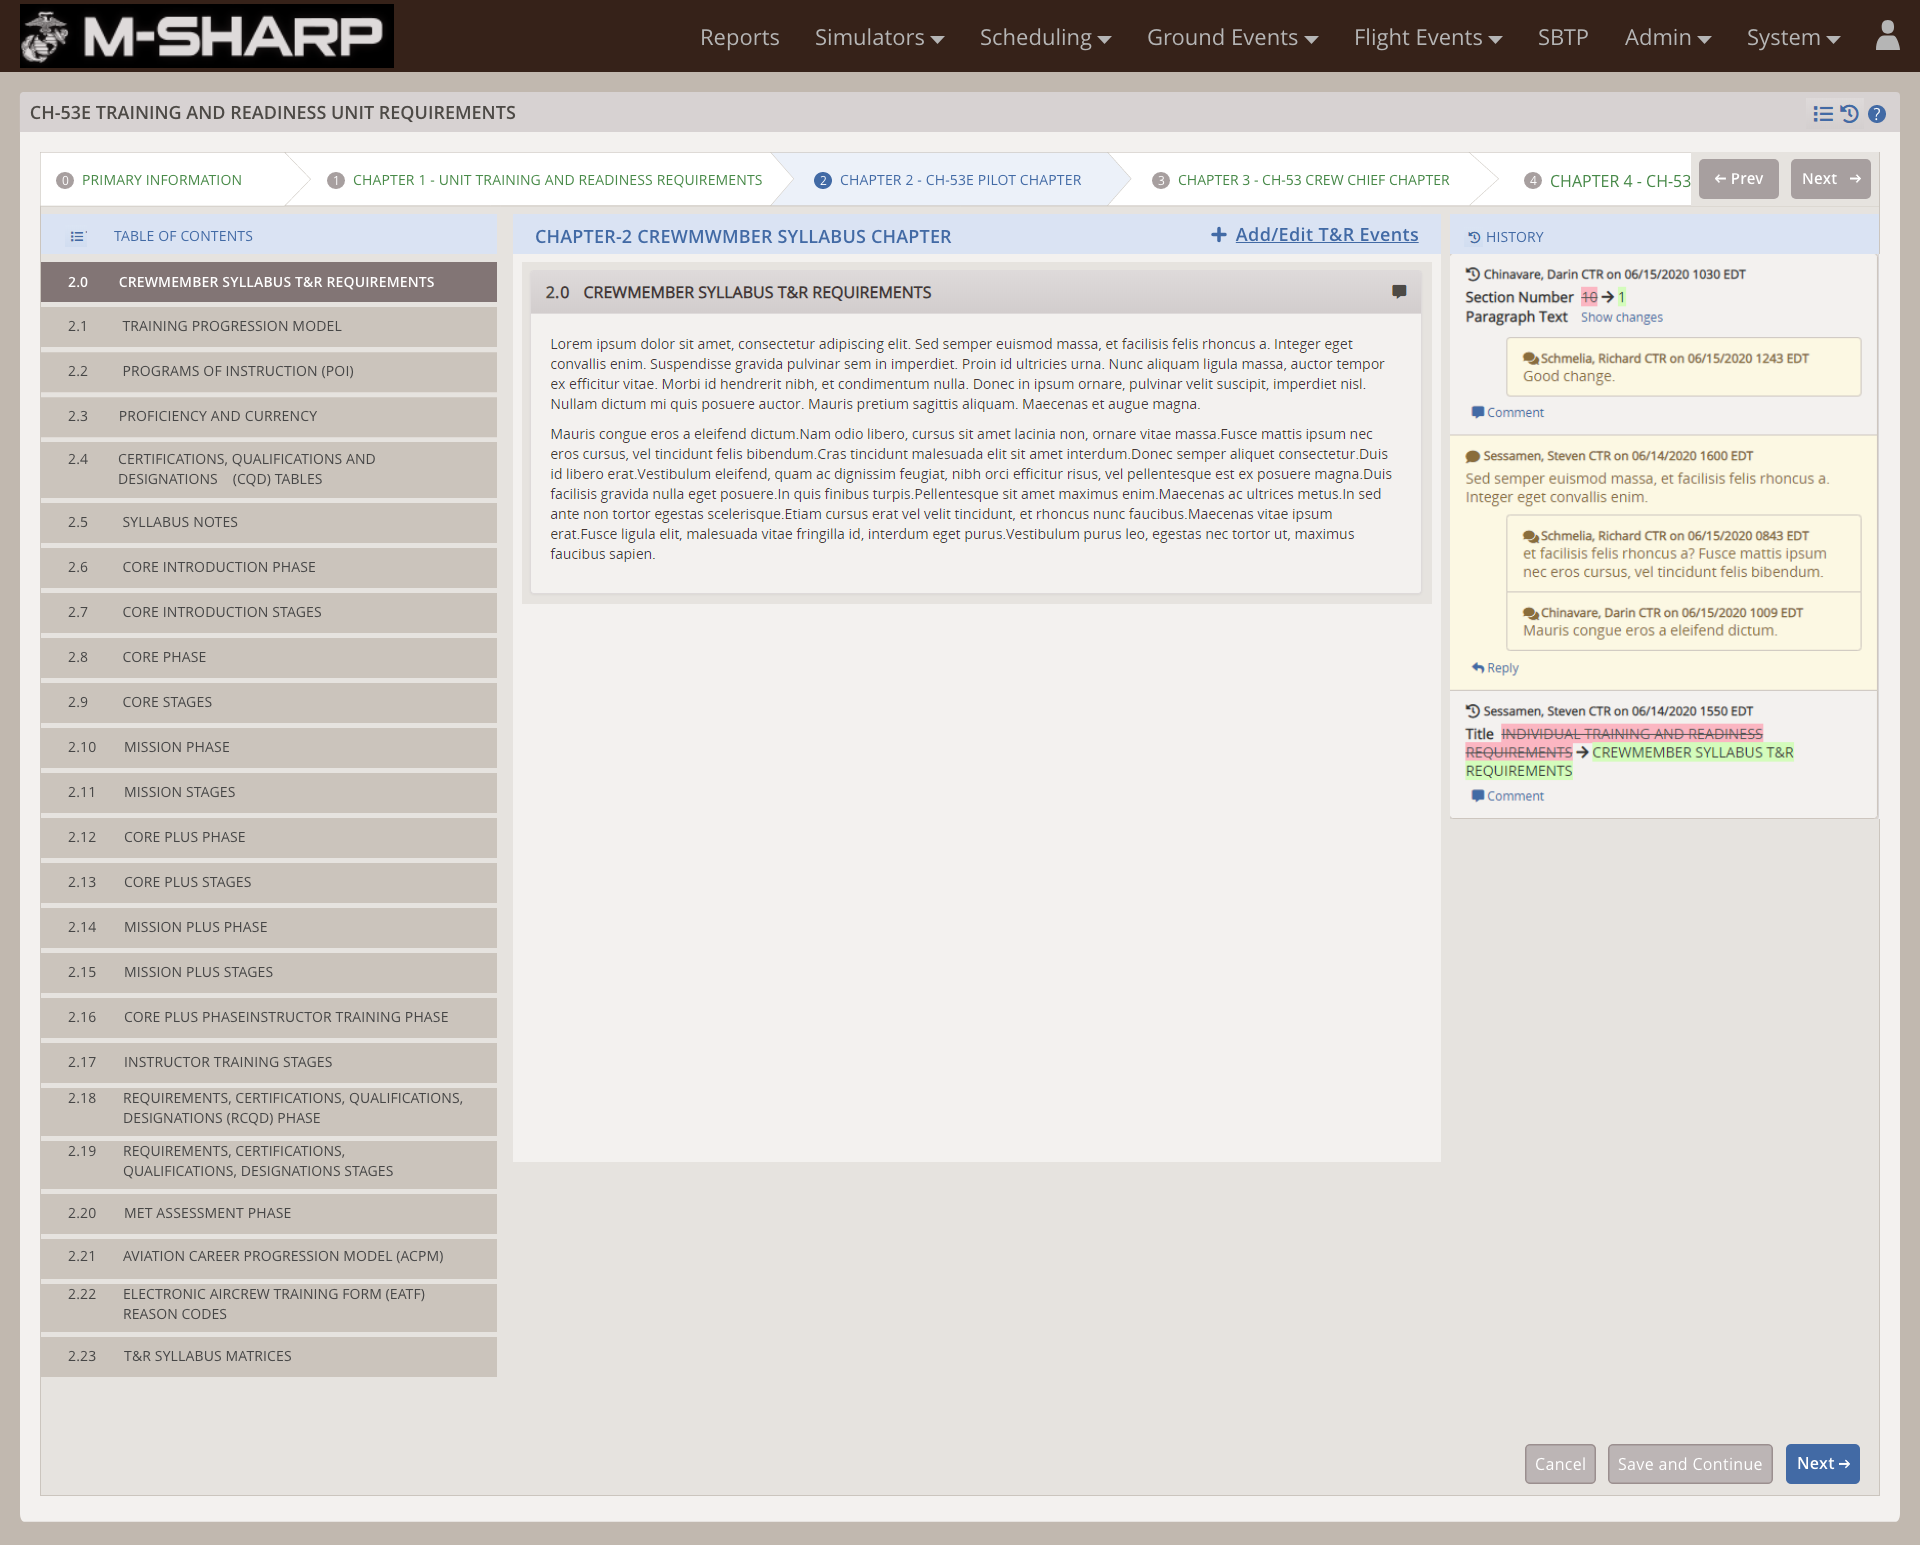
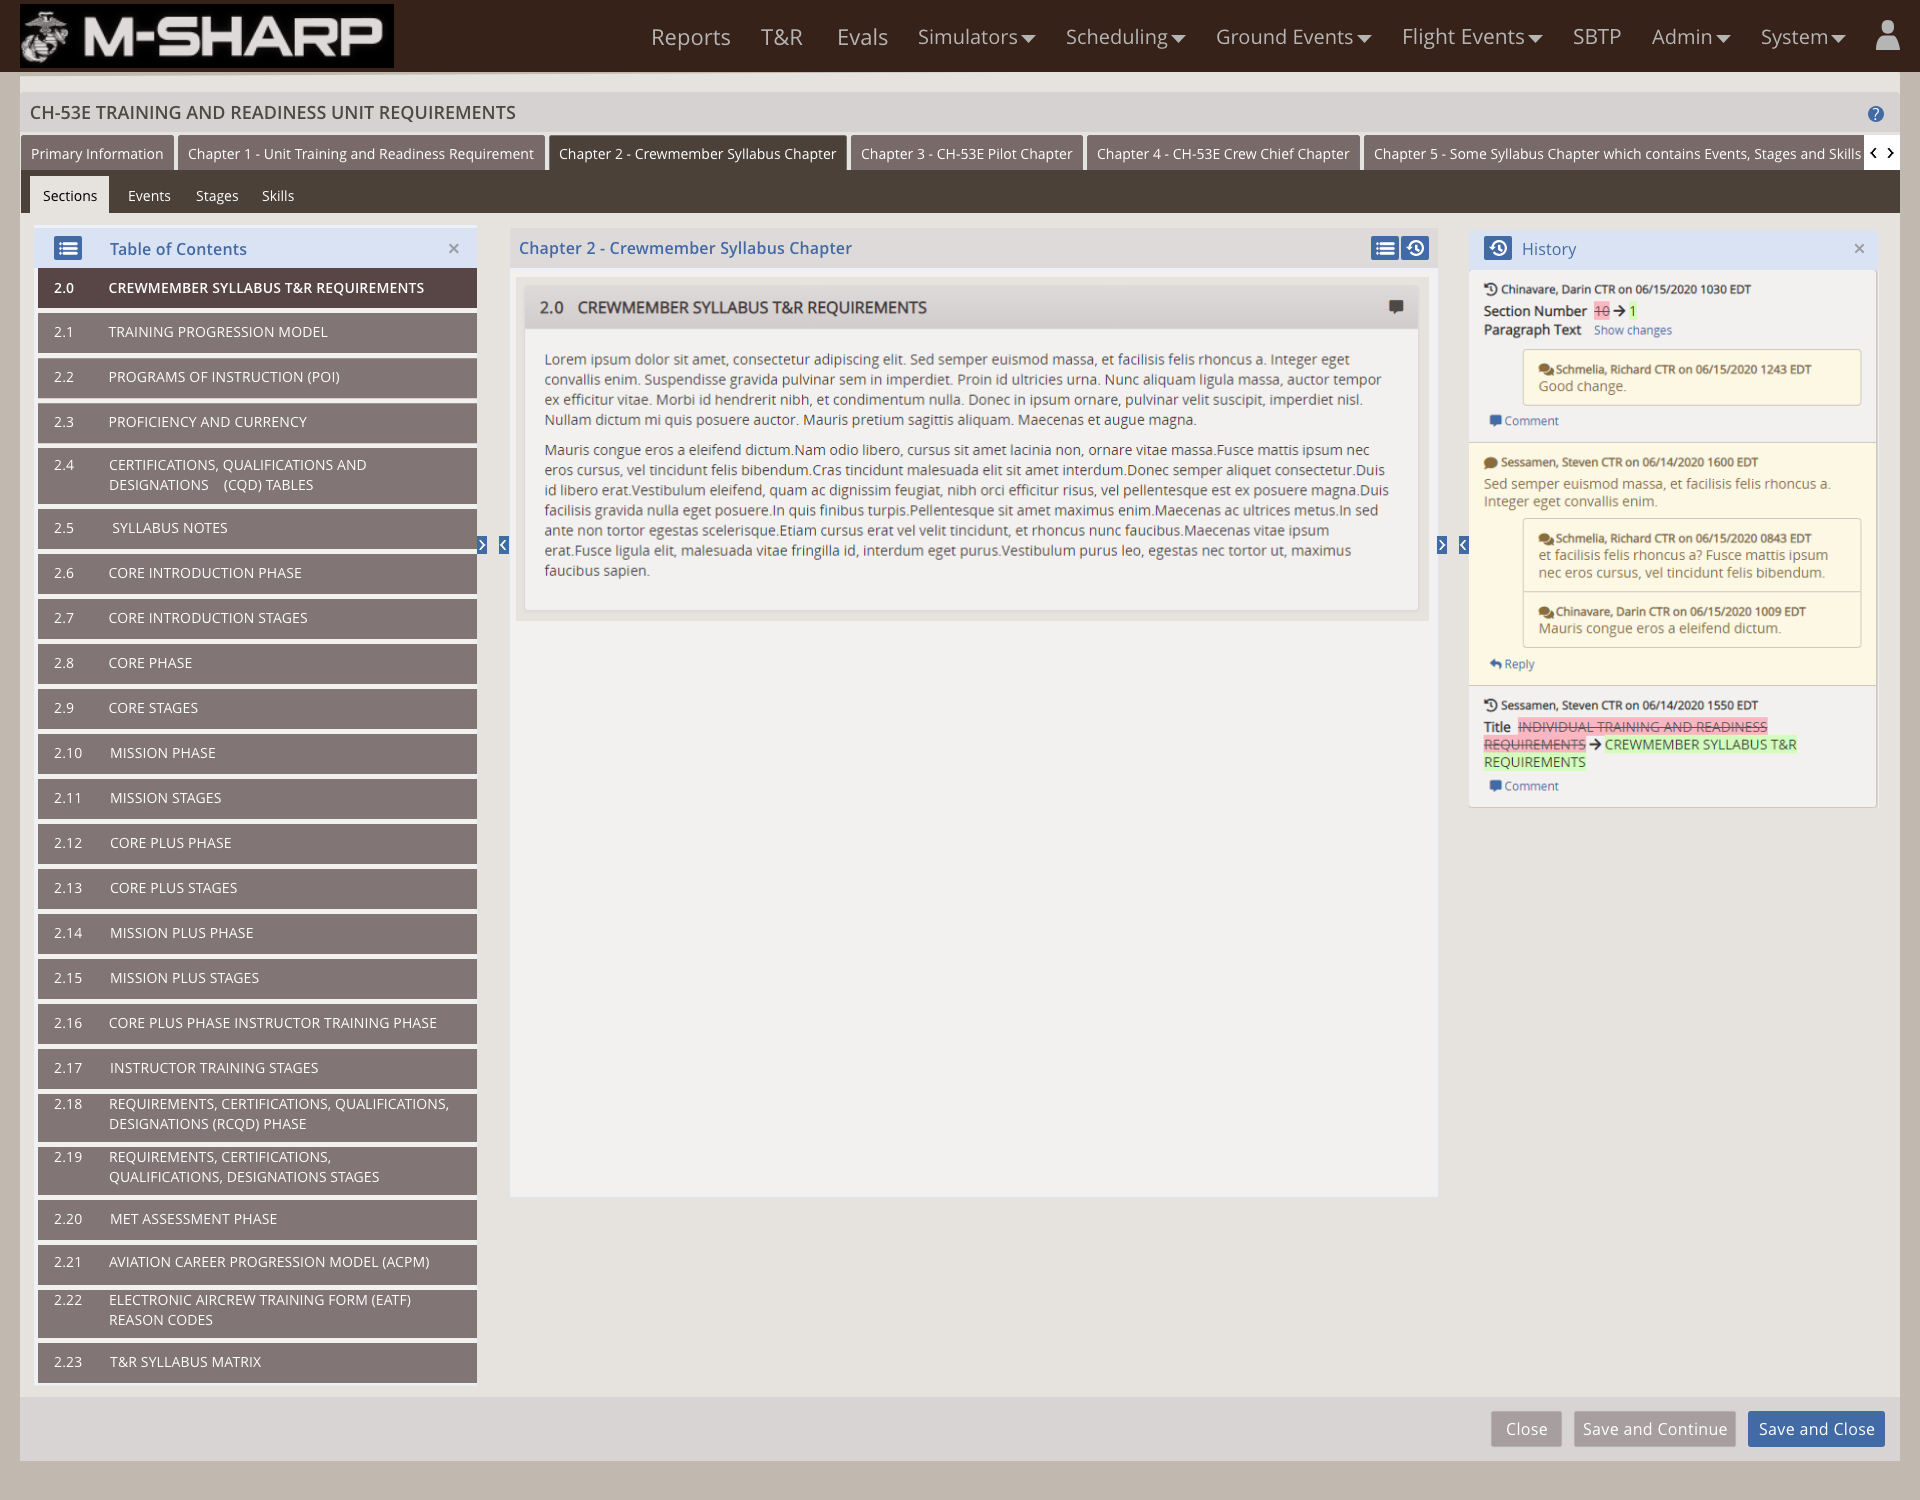
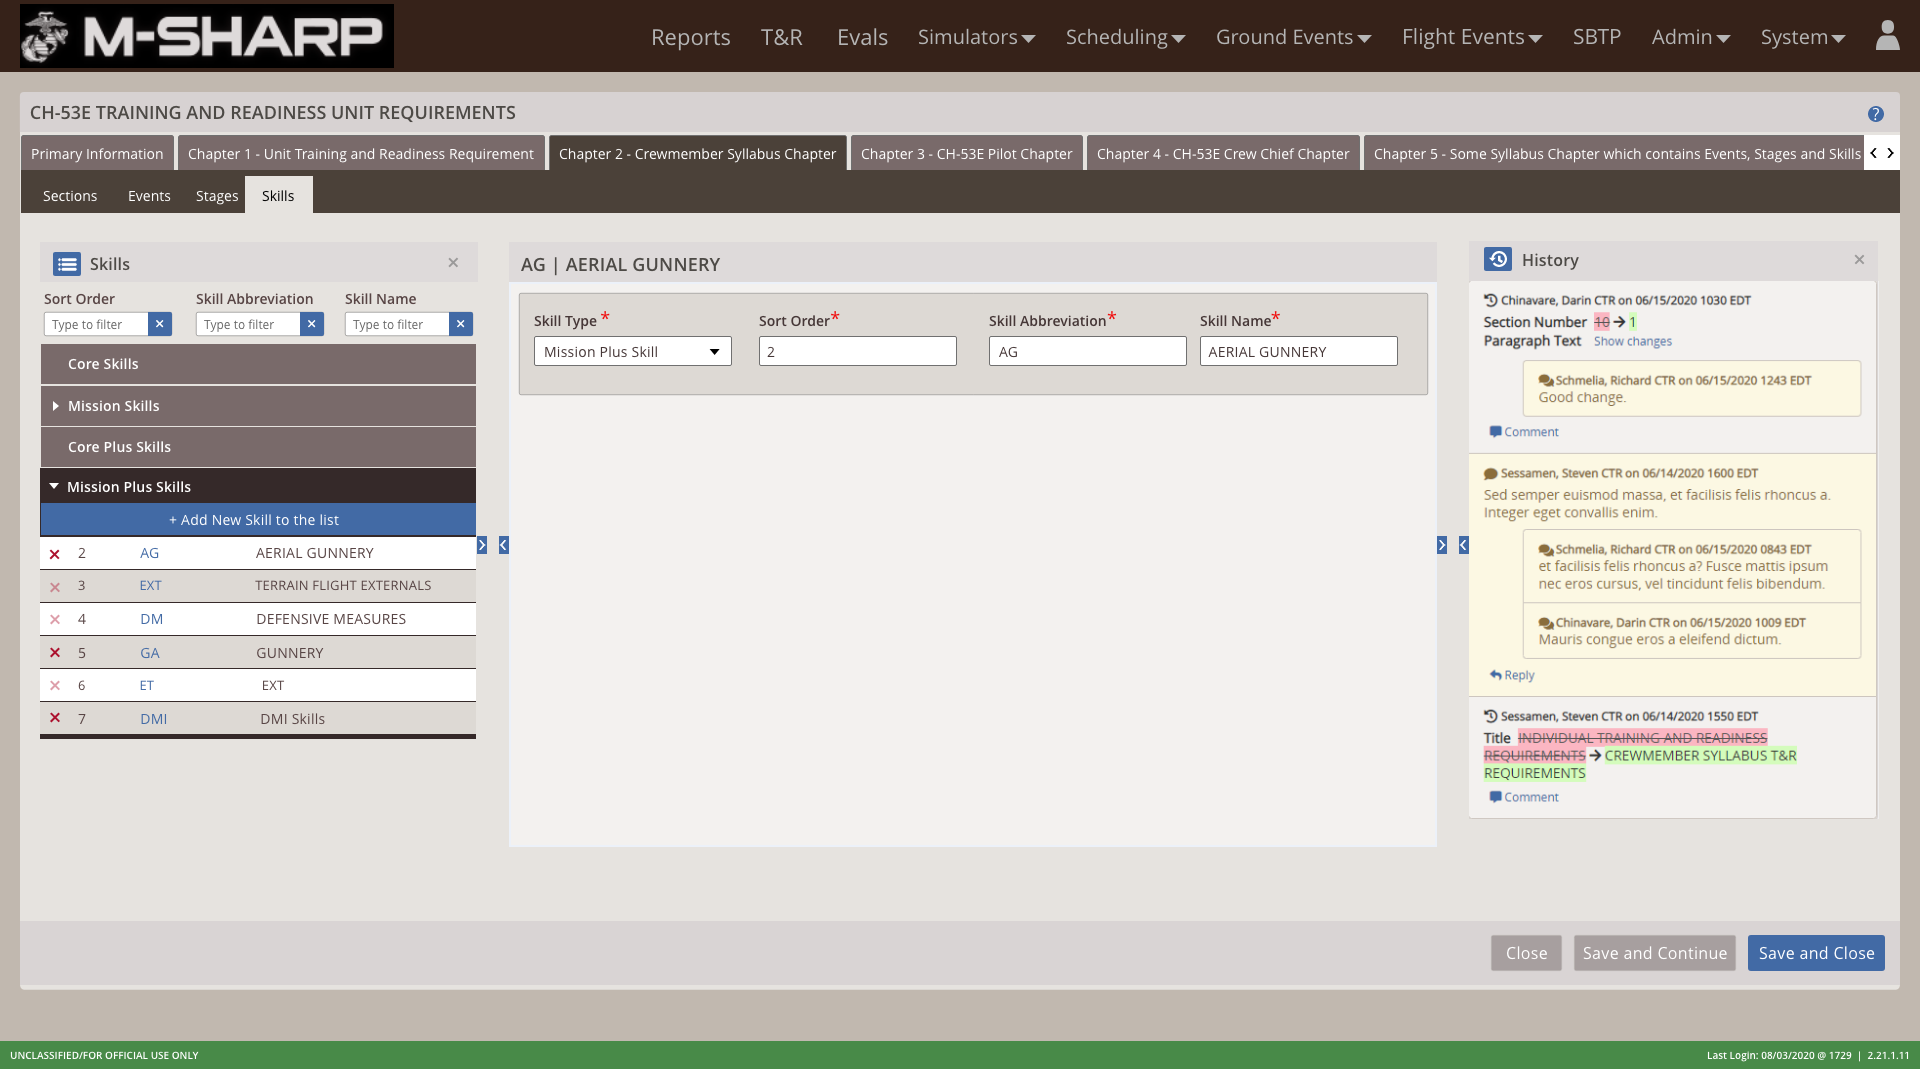
I have designed the manual structure into three panels: Left, Center, Right.
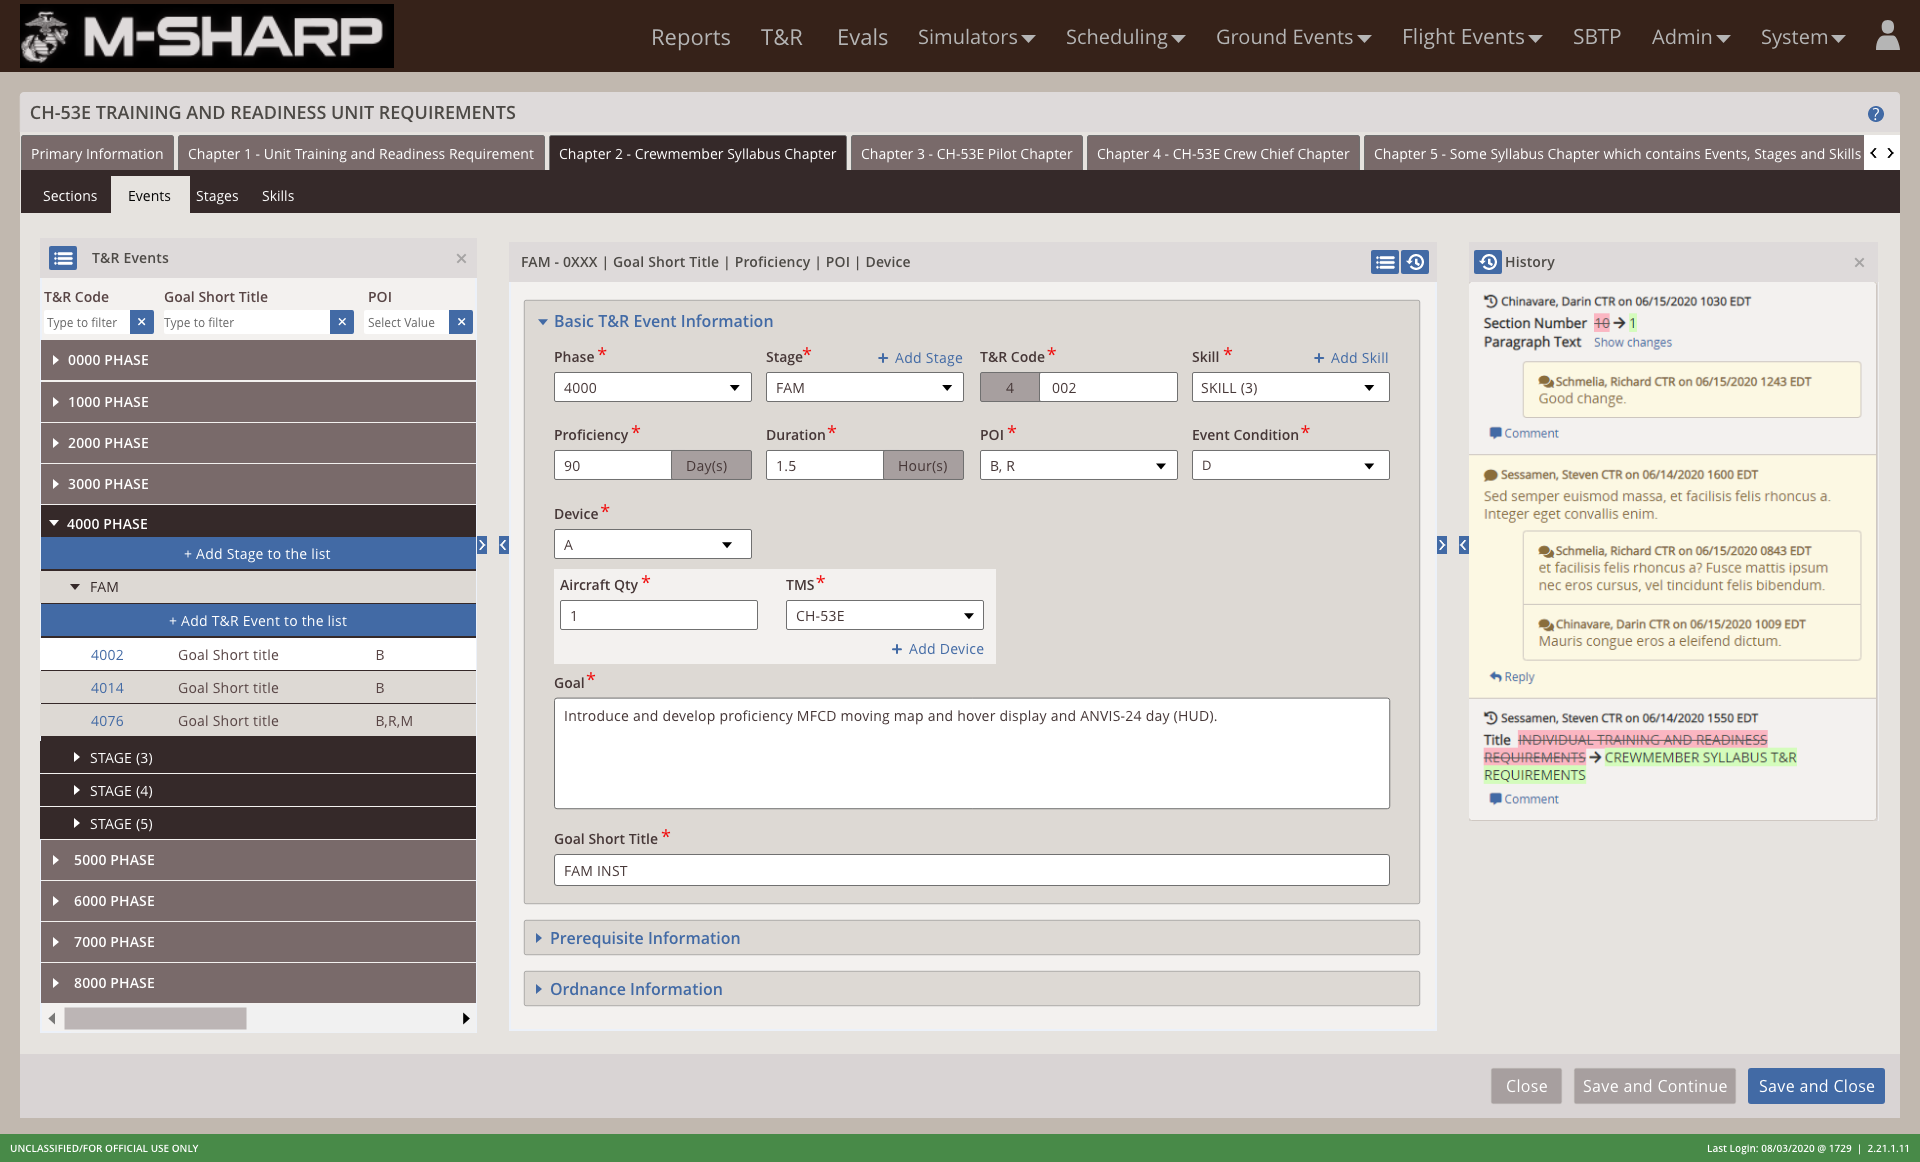
Each chapter has sub-parts called Sections, Events, Stages and Skills. I have added a second level tab where you can access these sub-parts.
 Version 1 | Basic draft design
 Version 2 | Page structure details added
 Version 3 | UI enhanced
The coding process begins after I share my designs and I assist the development team with any design or functionality related queries. I make sure that there aren't any design issues and the developers have followed my design specifications.
Once the code is reviewed and pushed to the Testing environment, it’s time for quality engineers to test for bugs or issues that might have been overlooked during the implementation step and fix them. I support the quality engineers by testing UI functionality. I ensure that the functionality is as per the designs I've provided.
The last stage of the iterative process is evaluation. Product Owners demonstrate the developed features to the Marine Captain(our customer Marine Corps) to get the feedback and check if all the requirements are met. I observe and note down any additional requirements or changes that the Captain requests for. These changes will be added in the next iteration.
As a sole designer on the team I get to interact with people from multiple areas of expertise and increase my user interaction time which helps me enhance my ability to think as a user and design for the user.
Design is everyone’s problem in the teamAs a team, not only the designer but if the developers, product owners and quality engineers also think from a user’s perspective during product requirement gathering, coding & testing a better product can be built which the user relishes.
Provide T & R manual versioning.
Produce a printable manual.
Marpidi Web
Marpidi Mobile
My Inventory
GE Energy
WEC
Freelance